

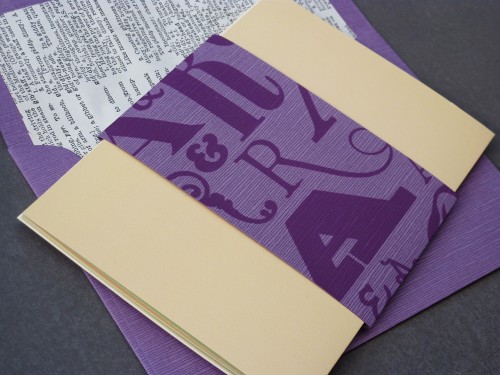
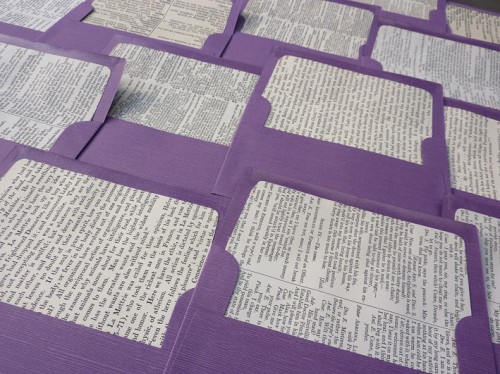
To add an extra little surprise to my Victorian library theme wedding invitations, I made some envelope liners from old book pages. Here are the step-by-step instructions:
You will need:
- envelopes
- old book pages
- piece of card
- pencil
- ruler
- cutting mat
- scalpel
- glue roller
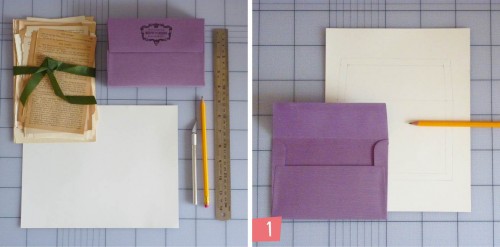
1. Open your envelope flat and trace around it with a pencil onto card.
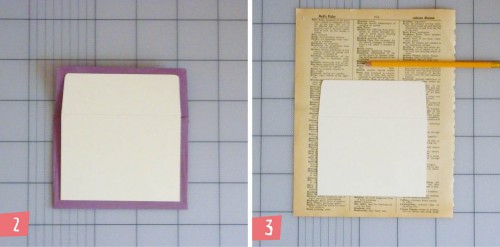
2. Measure and mark out another line 1cm inside the first one. Cut out.
3. Trace around your template on the book pages.
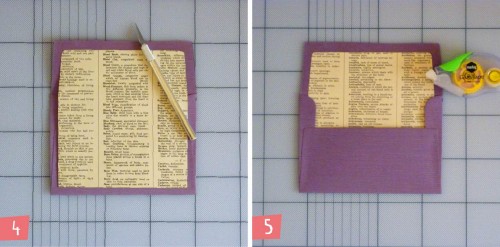
4. Cut out as many liners as required.
5. Roll glue around inner edge of liner. Slip inside envelope, 1cm from edge. Press down firmly. (Note: The glue roller ripped the fragile old paper I was working with. It is ideal for use on thick, new paper but I would recommend using a glue stick, double-sided tape or spray adhesive if you are using delicate paper.)
I won’t lie, this was quite time consuming! But if you’re after a budget-friendly addition to your envelopes, DIY liners could be for you.
![]()
Ms Polka Dot says: Here we welcome back again, the talented Alicia from Akimbo with a simple but effective project to make. It just shows that a little extra effort will make any envelope a pleasure to open!
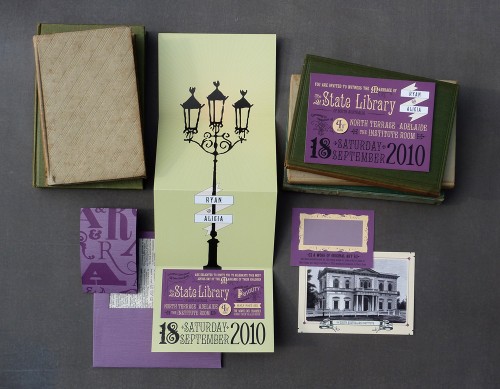
Hi, my name is Alicia and I am a paper addict.
I love designing quirky invitations through my business Akimbo. I’m also the Atypical Type A, my blog where I share projects and inspiration for home, parties and weddings.


Love this idea Alicia, I LOVE envelope liners (why don’t we do that more in Australia?) Though I do have to add, make sure he books you cut up aren’t valuable!
Tell me about it. If there are any retailers out there selling nice envelope liners in ISO sizes, make yourself known!
Note: No precious books were harmed in the making of this tutorial.
These are gorgeous invitations!!! I love DIY projects and I love how you added your own touch to them :)Great job.
Adorable invitations. The liner process is much smoother if you use Illustrator to create your template. The commercial printer I work with can cut from my lines. If we cut them in-house I use my printed illustrator template to create a cardboard template. For installing into envelopes, scrapbooking adhesive rolls are quick and mess-free.