

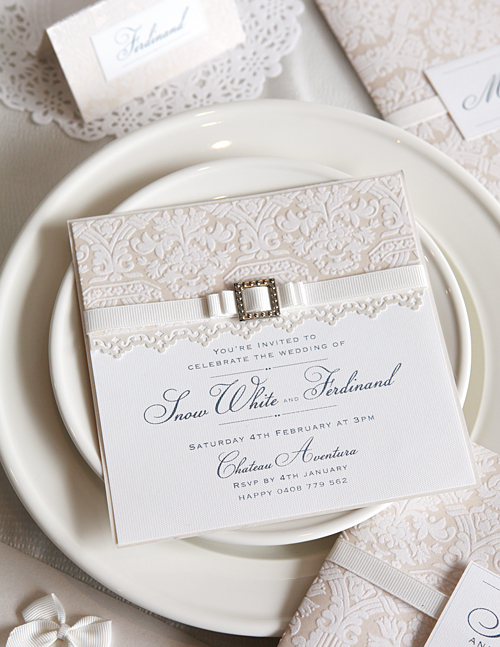
For the traditionally inclined bride, there is nothing more elegant than white on white. Feel like a true princess on your wedding day with this classic, yet sophisticated invitation. With subtle layers of shimmering pearl paper, exquisite flock and sparkling silver accessories, this invitation promises a dreamy, opulent and irresistibly romantic affair.
Step One
Print or photocopy desired invitation wording onto a sheet of plain paper, such as the shimmering pearl pictured. Allow enough space on the left side, approximately 75mm, for the paper and ribbon. Trim to a size of 140mm x 140mm.
Step Two
Take a sheet of flocked paper with a horizontal design and carefully cut out a panel using a pair of sharp scissors or a paper trimmer. Trim to a length of 140mm and carefully attach to the top of the invitation with adhesive tape.
Step Three
Cut a piece of white ribbon to 150mm. Adhere to the invitation using an adhesive tape roller. Tuck the ends around the back of the invitation and fasten for a neat finish. Cut another piece of ribbon to 120mm. Make a buckle bow, please refer to instructions below.
Buckle Bows
Making a pretty buckle bow is easier than it looks. You need only a buckle and a length of ribbon to create this beautiful, yet versatile embellishment. You can learn how to create a single or double buckle bow.
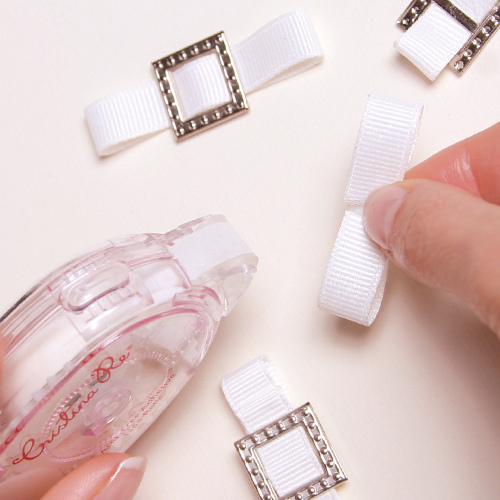
Step One

To make a single buckle bow, cut a piece of ribbon to a length of 100mm. To make a double buckle bow, cut two pieces of ribbon to 60mm and 90mm. Fold the ends of the ribbon in to the centre as shown and secure with adhesive tape. Be sparing with the tape to ensure the ribbon has a nice loop on either side of the join.
Step Two
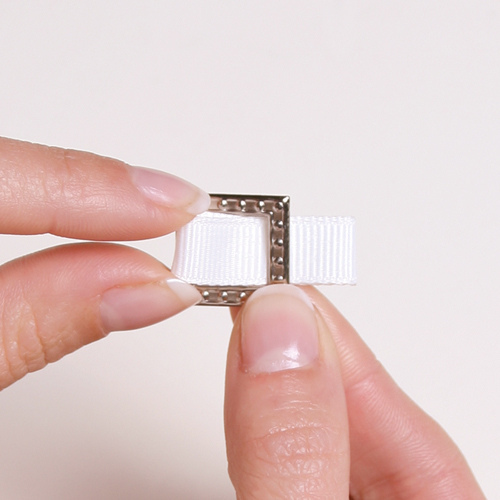
Thread the first bow made in step one through a buckle as shown. The single buckle bow is now complete. If making a double buckle bow, thread the shortest bow through the buckle, and leave the second bow for step three.
Step Three
To finish the double buckle bow, affix the second bow to the back of the buckle using adhesive tape. Attach these beautiful buckle bows to invitations, menus, booklets and more. The possibilities are endless!
Helpful Hint
When familiar with the process of making a buckle bow, experiment with different ribbon layers and positioning to achieve some exciting and unique looks. Try making the ribbon element for two double buckle bows and join them together to form a small cross. These embellishments look great on bombonierre boxes and lolly bags.
![]()
Ms Polka Dot says: Elle from Cristina Re joins us with a project to make your own invitation. We love the scalloped edge on the paper which adds such an elegant touch. Thank you Elle for sharing this project with us.
Cristina Re‘s stylish boutique Where a Girl Goes offers a variety of papercraft workshops. The Brilliant Bride workshop provides expert tuition for participants to be inspired and create the wedding of their dreams.


Can you please post a supply list and maybe suggest a few places where someone could purchase the supplies? Specifically the buckles.
Hi Amy,
All supplies are by Cristina Re (including the buckle). They do have stockists around Australia or you can purchase items through the Cristina Re website
Pearl Paper http://cristinare.com/43/designer_card/42/shimmering_pearl
Flock Paper http://cristinare.com/45/flocked_paper_couture/231/majestic_pearl_a4
Buckle http://cristinare.com/107/designer_buckles/87/silver_buckles
Ribbon http://cristinare.com/111/grosgrain_ribbon/188/ivory_ribbon
x Ms Polka
Didnt know the forum rules allowed such blriliant posts.
Where did you find those buckles? I love your invite. We are making my daughters and we need a buckle like that.
thank you
Hi kathi,
The buckles are from Cristina Re http://cristinare.com/107/designer_buckles/87/silver_buckles
AWW! That is so, so pretty! I love how you did the buckle! I would love to link to this in my next DIY Invitation Roundup if you didn’t mind.
Of course!
I love how elegant those look! Would you mind if I feature this tutorial on my blog? Thanks so much for sharing!
Hi Dee- of course!
Hi,I am from Brazil.I loved it! Do you deliver here? And I also like to know about the “paper” that is below the ribbon. Where can I find it? (Sorry about my english. I don´t know if it is correct). Tnahk you e congratulations. Your website is beautiful!
Hi Camilla, the paper is from http://www.cristinare.com/
Officeworks sells Cristina Re stock. Thats where i got mine from 🙂
I am looking for invitations for my daughters wedding, which will be May of 2012. I love the “majestic pearl wedding invitation”. Where can I get these made? And can the color be in ivory?
These are exactly what I have been looking for! I was wondering what you actually used as the envelope then.
Thanks!
just wondering what font did you use??
Hello,
First of all, this is a beautiful invitation!! I was wondering, what did you use as an envelope?
Thank you!
Hi there, Best to contact Cristina Re directly http://www.cristinare.com/
Could you please tell me what paper you have used for the design cut out just below the ribbon?
Is it Cristina Re paper?
Hi Jess
It’s all Cristina Re paper.
Just wanted to say, these are REALLY great!
Hi! I love these invitations, they are so beautiful. I would like to place an order but I have one question, how did you cut the flocked paper in order to have a sort of lacey designs at the bottom, does the paper come pre-cut like that?
Thank you!
Hi Sara
This is a DIY tutorial so best to contact Cristina Re (the author) directly.
Hi
Do you take orders for the invitations? or is the website aimed at do it your self?
Thanks
Diane
Hi John
This is a tutorial. You need to purchase the pieces to make it yourself.
Hi, lovely invitation!! What font did you use? Its so elegant!
fab Invitations! Well done.May I ask how you achieved the scalloped edge from the paper used?? Thank you!
Hi there Theresa, I believe this is done with a paper cutter.
Great invite!
Where can I purchase the envelope shown in the picture?
Hi there
All materials can be purchased from Cristina Re http://www.cristinare.com/
could you help me locate it? i can’t seem to find it
Hi Diana
Do you mean the item in the bottom right of the first picture? It’s not an envelope, rather a wallet made out of this card http://www.cristinare.com/45/flocked_paper_couture/231/majestic_pearl_a4
ohh, thanks! do you have any other pictures of what the front looks like? (the wallet)
Unfortunately all the photos I have are in the post. Perhaps contact Cristina Re if you need more information.
Hello,
I am making these invitations & it looks like there is another bit of paper at the back of the invite, what do you use for this?
Hi Kate, it would be best to get in contact with Cristina Re at http://www.cristinare.com/ for any in depth questions about the tutorial! Happy planning and invitation creating! x Ms Rose
Oh & also, in the pic I can see some other things made in the background using the flocked paper, what are these?