

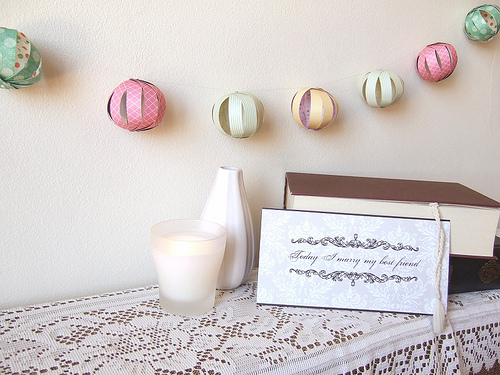
Image by Stephanie at Stelloberry Designs
These garlands are a beautiful and simple way to decorate your wedding venue. They also provide a way for you to incorporate the colours of your wedding into your venue decorations. They don’t take long to make, and the visual impact is well worth the effort. Materials:
- Good quality patterned paper (scrapbook paper works well)
- Split pins (also known as brads)
- String (strong cotton or beading thread)
- Cutting mat
- Craft knife
- Scissors
Step 1 Using your cutting mat and craft knife, cut your patterned paper into 9 strips each measuring 1.5cm x 10cm
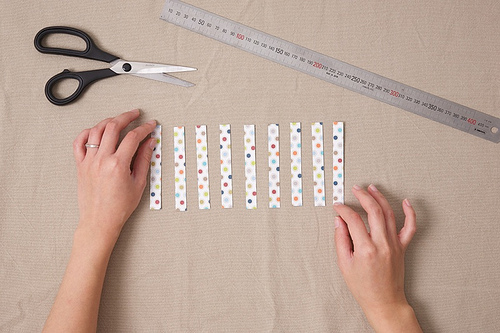
Image courtesy of Pictura Studio
Step 2 Stack the strips on top of one another and fasten together at each end with a split pin. Then fan strips out in the middle to create a bauble.
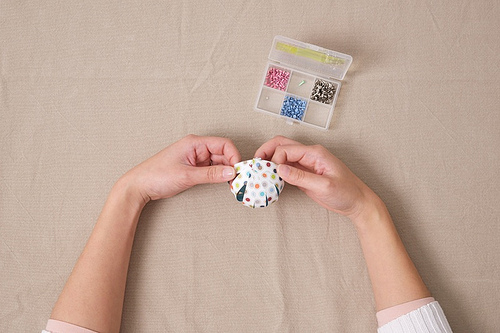
Image courtesy of Pictura Studio
Step 3 Make around 8-10 baubles. Attach each of the baubles to a long piece of string by tying the string around the head of the split pin in each bauble. The number of baubles and the length of string you use will determine how long your garland will be.
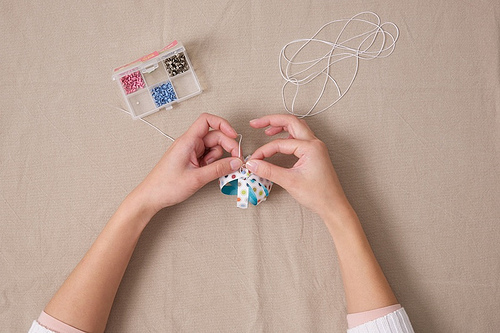
Image courtesy of Pictura Studio
Step 4 Hang your garland in the perfect spot to add that whimsical touch to your wedding!

Image by Stephanie at Stelloberry Designs
Tips:
- Once your wedding is over, you can re-use these garlands for decorating your home or at your next party.
- Experiment with different patterned and coloured papers for interesting effects.
![]()
Ms Gingham says: This is much easier than I thought it would be. The garland would suit a variety of uses … just change the paper to suit the mood. Thank you goes to Stephanie from Stelloberry Designs for sharing this with us! About Stephanie: “Hi, I’m Stephanie from Stelloberry Designs. I own a Sydney-based stationery boutique that specialises in designing and handcrafting invitations for special events. I love paper, pretty bits and pieces, and innovative design. I hope you’ll come and visit me at my website – I’d love to see you there!”


Stephanie I love this project- so simple yet so festive! Can’t wait to see what you come up with next!
Thanks Ms. Polka – I had a lot of fun with this project – I’m glad you like it!
This would be a wonderful idea for Christmas decorations, would be great fun to get children involved in too. I love the simplicity but the versatility of the design. Excellent work
Thanks Julianna, so glad you like! You’ve got me thinking about a Christmas version now – I might do one up just to see 🙂
What size split pins/brads did you use to make these?
Hi Louise! I used quite small brads (I think they’re 4.5 to 4.7mm ones), but I think any size will do fine. It just depends on how much you want the brad to stand out in your bauble – the smaller the brad, the less obvious it’ll look. Oh and you shouldn’t have to worry too much about tying string around them – I was able to tie string around the heads of the small ones without any trouble. I hope that helps! 🙂