

I am a big fan of the appearance of natural shapes and objects appearing in home décor, and as a result I thought I would design and create my own diy Christmas Tree this year using local native bushland as inspiration. This tree is also great for those not wanting a fake plastic tree, or those with limited ground space or wanting to keep precious ornaments away from little hands or paws (I’m of the latter!). The tree can be as little or as big as you want, all that limits you is your space and the branches that are available to collect.
With some modifications, this tutorial would also be great for wedding table centrepieces, just replace the Christmas decorations with theme-appropriate ones.
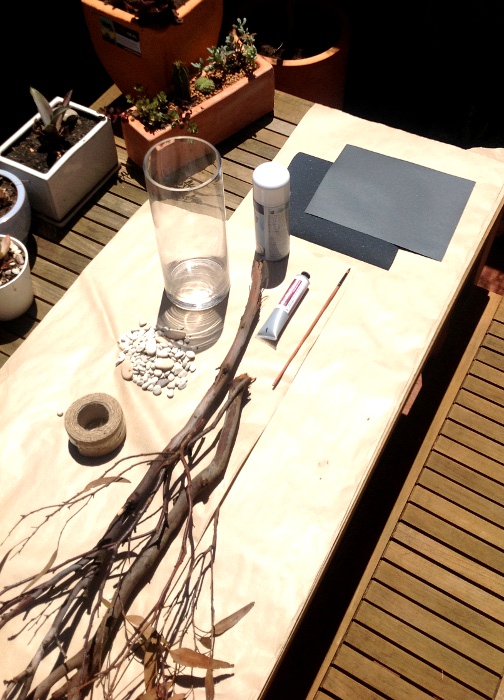
For this tutorial you will need:
- A bottom heavy medium/large vase (glass is optional, ceramic would work just as well)
- Heavy ‘anchor’ filler for the vase (if you are using a lightweight vase or if your arrangement will be top heavy I recommend using stones or something with a bit of weight to it – I used river pebbles)
- Optional – lighter weight decorative filler for the vase such as tinsel, confetti or twinkle lights
- An assortment of fairly sturdy branches
- Fine weight sandpaper (1-2 sheets)
- Damp cloth
- Saw or secateurs for trimming branches
- A drop cloth
- 1-2 cans of spray paint in your chosen colour (optional – 1-2 cans of white undercoat if using a bright colour).
- Acrylic paint/glue and glitter and any other embellishments you would like to use to decorate the branches
- Christmas decorations
What to Do:
1. Go to your garden/local park* etc and collect an armful of branches that have a nice ‘branched’ look. Please only pick branches that have been naturally shed from the tree and do not pick all of you branches from the one spot – variety in shapes, thickness and colour adds interest!). If you pick up branches with leaves attached, gently ‘hit’ the branch on the ground to dislodge any leaves which may fall off.
*Please make sure that you follow any local laws/guidelines about the gathering of ‘firewood’ or plant material when foraging.
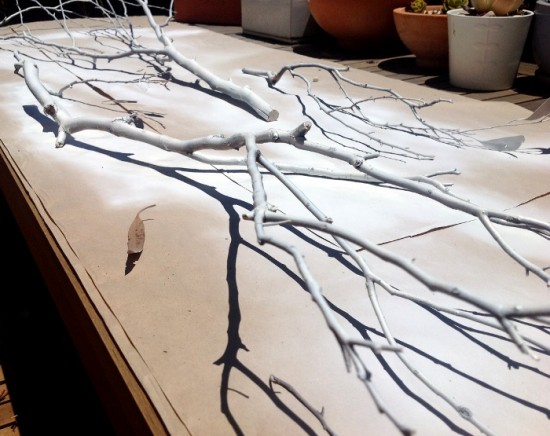
2. Set up your work area in a very well ventilated area (preferably outside), with the drop cloth or paper over any nearby surfaces you do not desire to have paint on
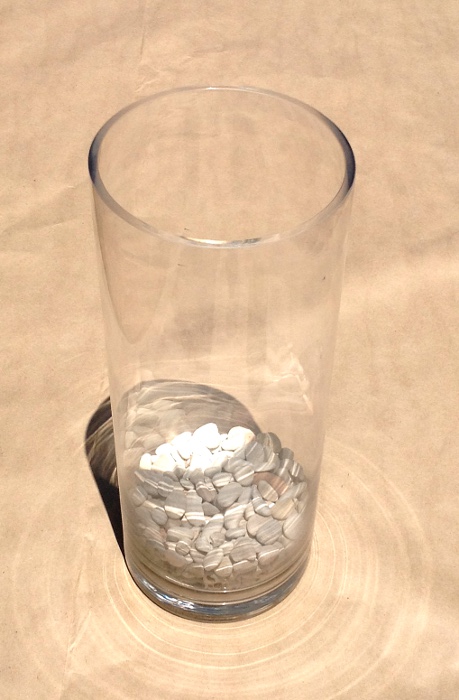
3. Place your vase on the prepped surface and fill to 25% – 50% with your large filler. Larger and heavier filler items will help you ‘anchor’ your branches in the vase.
4. Now experiment with layout of your branches in the vase. Mix and match sizes, textures and leaf content, deciding on how you will finally arrange the branches.
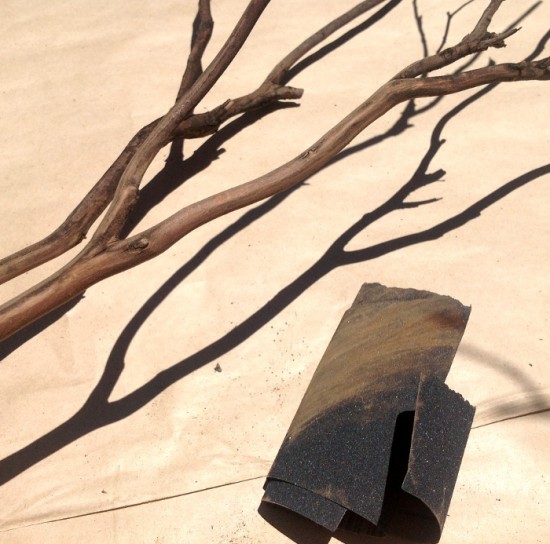
5. If necessary trim the length of the branches with your saw/secateurs and snap off any flimsy twigs/leaves.
6. Once you have decided on your layout, remove the branches and lay out individually on the prepped painting surface.
7. Lightly sand the branches to remove any residual dirt/loose bark (this does not need to be precise) and wipe down with a damp cloth to remove any dust.
8. Once your branches are prepped, lay out again on the surface and follow the instructions on the can for painting, using a moderate and even stroke to cover the top surface of the branches. If you are using a bright colour, I would recommend using a white undercoat to help the colour pop!
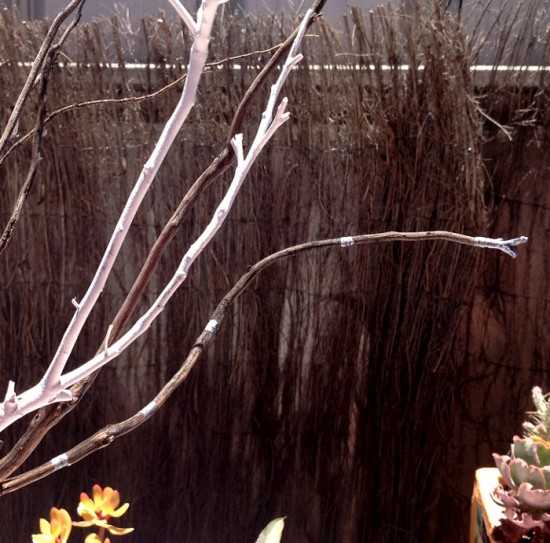
9. Before flipping over the branches to paint the other side, wait for the first application to dry (this should take 10-15 mins).
10. Repeat steps 8 and 9 until you have covered all of the sides of the branches to your liking (or run out of spray like I did!!).
11. You do not have to paint all of the branches; I left some of them bare and painted silver stripes with acrylic paint as decoration. You could also dip the branch ends in glue and glitter or acrylic paint for a modern look.
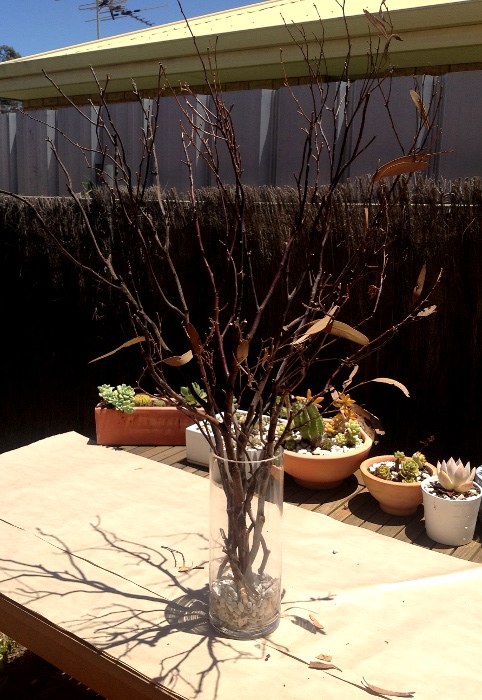
12. Once your branches are dry, carefully place them in the vase as previously arranged and move the vase to your display spot in your home (preferably a raised table or shelf). If you are using tinsel or twinkle lights as a filler, it would be a good idea to wrap these around the bottom of your arrangement before inserting into the vase.
13. If you are using confetti/fake snow etc as filler, pour this into the vase once the branches are arranged.
14. Once the arrangement is in and secure, get out your decorations and start hanging! I find less is more with this type of tree – let the natural look of the branches come through. If you would like to string lights, be very delicate with the branches as they may snap if put under too much weight.
15. Sit back with an appropriately Chirstmassy drink and admire your work!
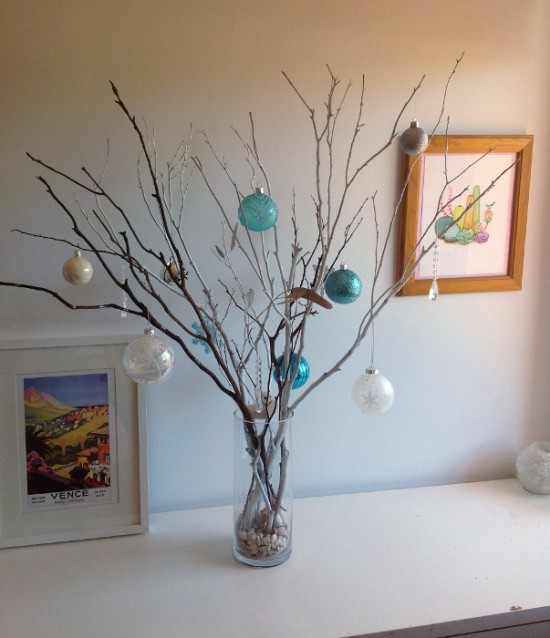
![]()
Ms Gingham says: I love the look of willow with fairy lights for Christmas and this is another version of this! Take away the Christmas ornaments and customize for your wedding as centrepieces too.
About Jess of Theori Jewellery: “Behind theori is a creative woman with a scientific background (Environmental Science). I’ve always been arty, but love the how and why of things. Working with metals and gems that come from the earth seem like a great mix between the two for me to have my creative outlet. I love the natural world, and am greatly inspired by it. Theori is currently based out of the Western Australian town of Kalgoorlie – a town made and sustained by mining. The harsh but beautiful landscape is a constant inspiration. “


Join the conversation