

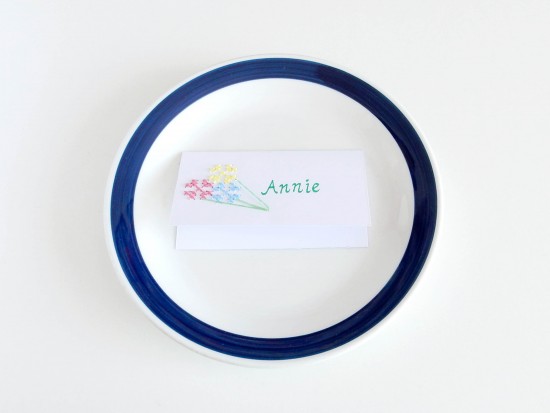
Bring a delicate floral touch to your table decorations with these cross stitch place cards featuring one large flower or a bunch of smaller blooms.
You can create variety by using both designs, or by working one design in multiple colours!
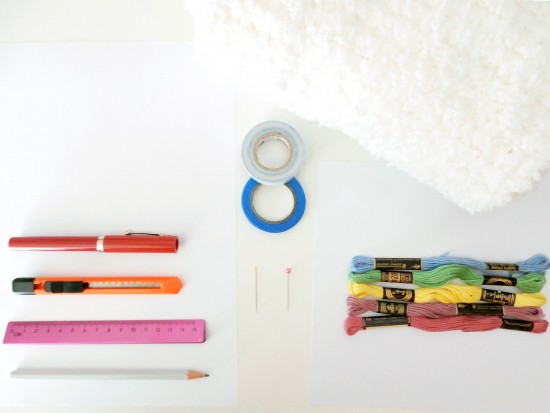
What you need:
- Cardstock or blank place cards
- Paper in the same colour
- Ruler
- Pencil
- Eraser
- Craft knife or scissors
- Cross stitch charts: download here
- Printer
- Washi tape
- Knit scarf or something else soft you don’t mind sticking with a pin
- Dressmaking pin
- Embroidery needle
- Embroidery thread
- Double-sided tape

If you have ready-made place cards you can skip this step, but if you are cutting your own place cards, measure the cardstock and mark the outlines and fold line with a pencil. My place cards were 10.1 cm by 11.4 cm flat, with the fold line at 5.7 cm (the halfway point of the longer side).
Score along the fold line to make sure the place card folds cleanly. I used the back of a craft knife blade. Cut out the place cards and carefully fold along the scored line, pressing down on the fold from the outside.
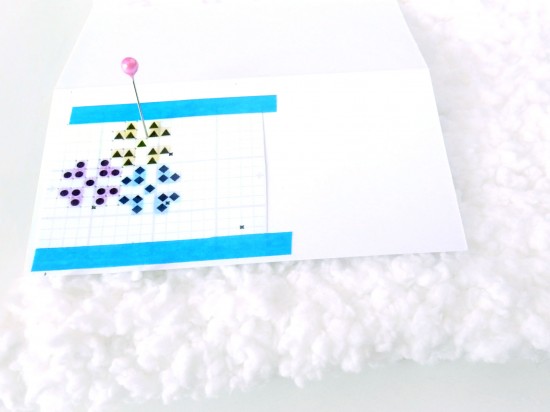
Print the cross stitch charts (they are sized to fit the place cards I made when printed on A4, but you can resize them as desired) and cut them out. Colouring the squares to match the thread will make them easier to follow! Mark the position of the cross stitch design on the front of the place cards with a pencil, pressing softly so it can be erased later.
I recommend leaving 0.5 cm from the left edge as a border. I left 1.1 cm from the top for the large flower and 1.3 cm for the bunch of flowers for each to be centred. Cut out the corner of the grid at the overall top left corner of the design and put it in position. Attach the charts with washi tape.
Place the card unfolded on a soft surface and use the dressmaking pin to make holes in the corners of all the filled in squares, and the extra cross on the bunch of flowers, being careful not to bend the card. The card is most likely to bend when punching holes closest to the left edge, so to avoid this hold the card in your other hand instead at that time. Carefully peel the charts off the cards and erase the placement marks.
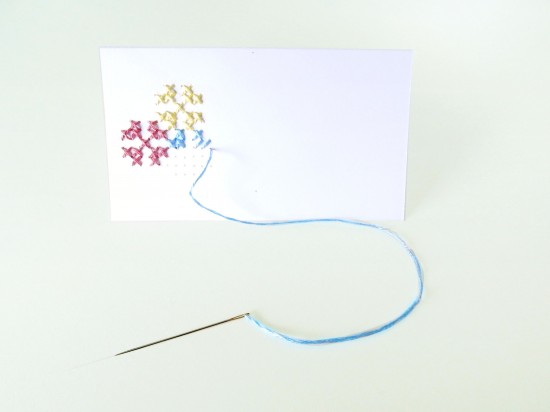
Using two strands of embroidery thread and starting at the centre, cross stitch the designs onto the cards following the charts. For the bunch of flowers make a long stitch from each flower to the hole on the far right for stems. Work carefully and not too tight to avoid bending the card.
Depending on the thickness of your needle, you may find it easier to widen the holes slightly by partially inserting the needle before working the stitch, especially when bringing the needle from the back of the card to the front.
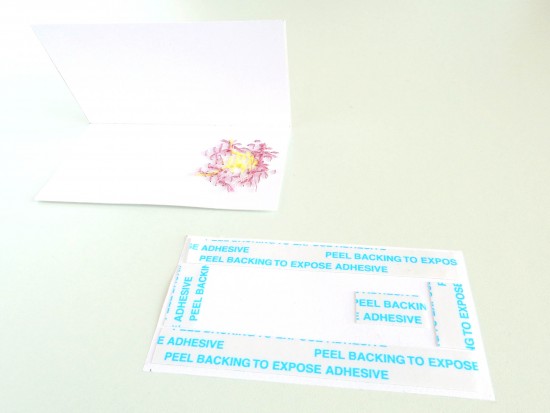
Once the designs are finished the back of the stitches and thread ends need covering. For each place card, cut a rectangle from the paper, 9.9 cm by 5.3 cm if you have been using my measurements.
Make a border of double-sided tape around the paper, with an extra piece to secure the back of the stitching. For the bunch of flowers I also put a piece of tape directly onto the back of the stitches as there were no adjacent stitches to secure the tail from the stems.
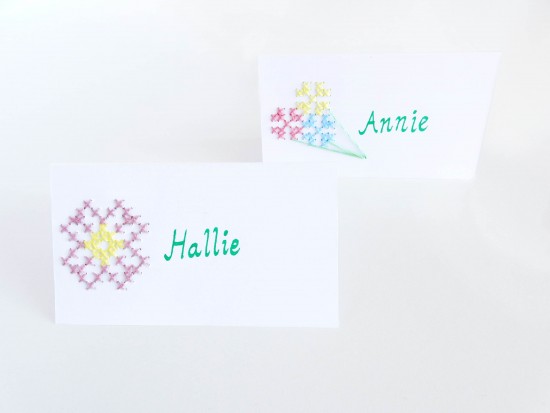
I wrote the names on the place cards with a fountain pen, but you can print them if you prefer. And now you’re ready to set them out according to your seating plan!
![]()
Ms Chinoiserie Says: Such an easy and pretty idea; sweet thought for all your bridesmaids to make during a crafty girls’ afternoon!


Join the conversation