

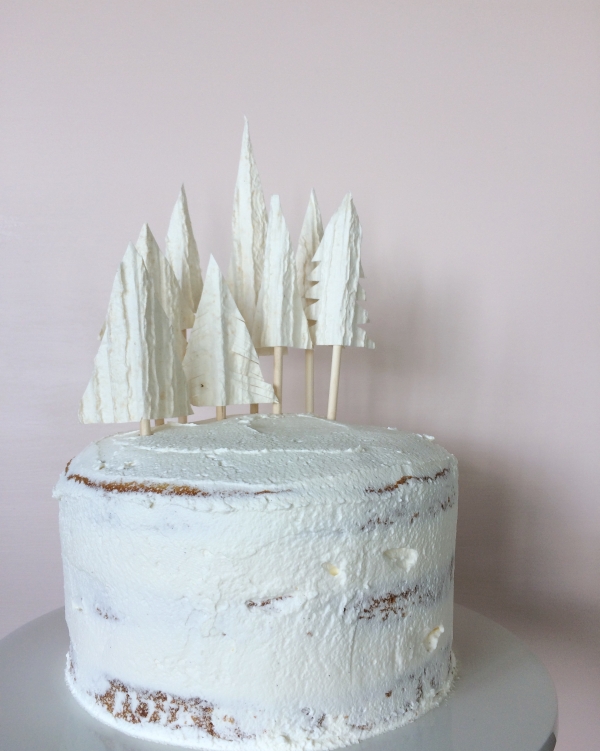
Baking for your own event may seem overwhelming, but a love of cake and handmade treats shouldn’t hold you back if you have a simple yet effective way of decorating. Enter these simple tree cake toppers! A quick and easy way to make your next towering cake look even more spectacular!
Play around with different shapes and materials to create a delightful forest on top of your next masterpiece, ensuring it will look stunning! Think clean and classic shapes and pastel paper for a modern romantic event, or go colourful to add some fun!
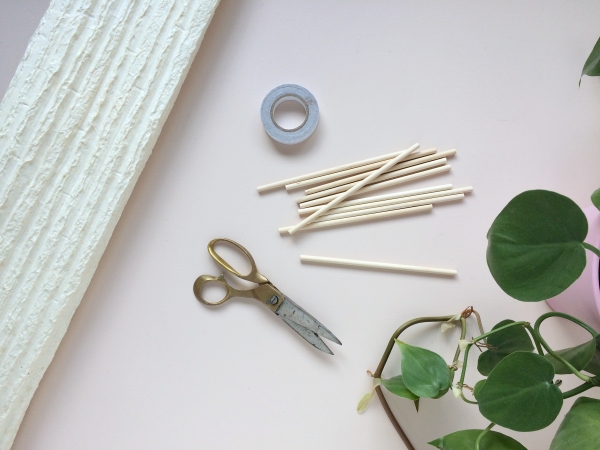
You Will Need:
- Wooden skewers or craft sticks
- Heavy paper stock in your choice of colour and texture
- Scissors
- Double sided tape
What To Do:
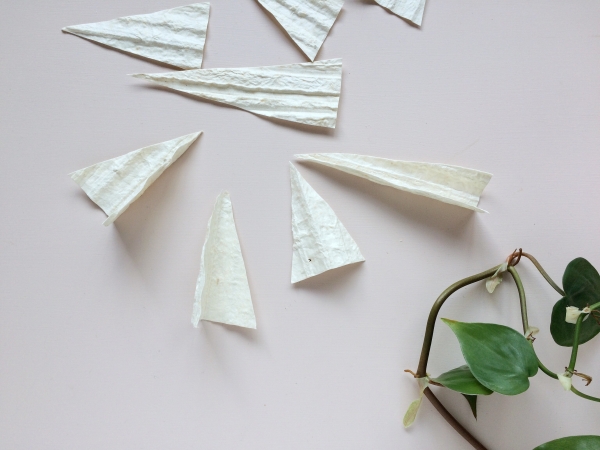
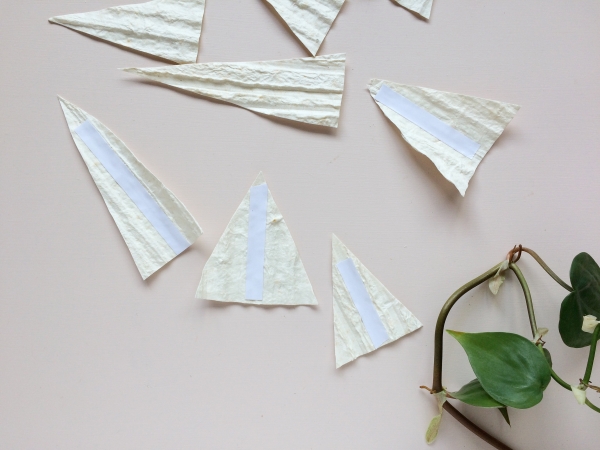
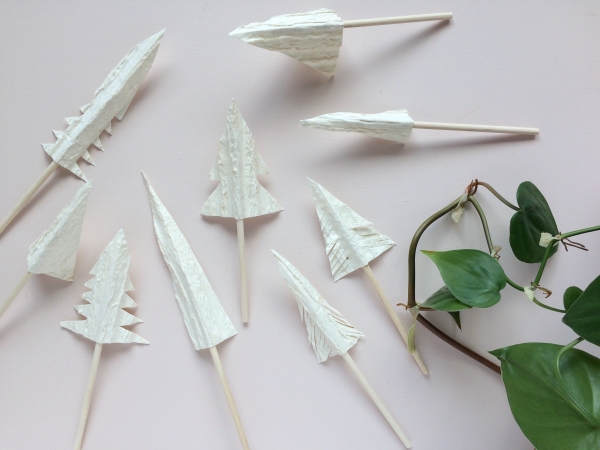
Step One. Begin by cutting out simple triangles for your trees. These can vary in height and width. Consider the size of your cake – don’t be afraid to make a lot of ‘trees’ as well as some larger sized trees for a statement look!

Step Two. Fold the triangles neatly down the centre from the tip to the middle of the base. Cut pieces of double sided tape and press these firmly to the fold.
Step Three. Firmly attach your craft sticks or skewers to the taped area. You can add a second triangle to the back side of you ‘trees’ at this point if you choose.
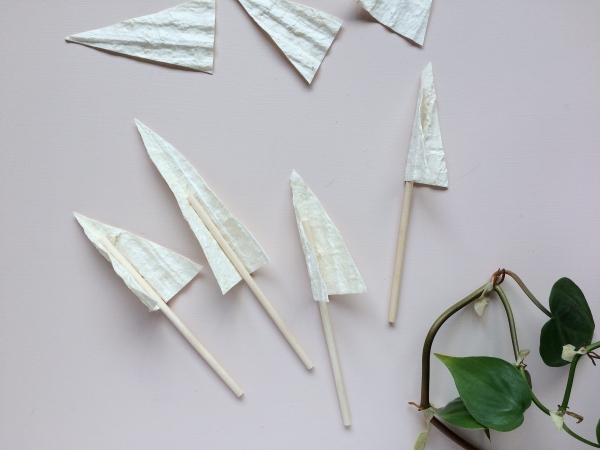
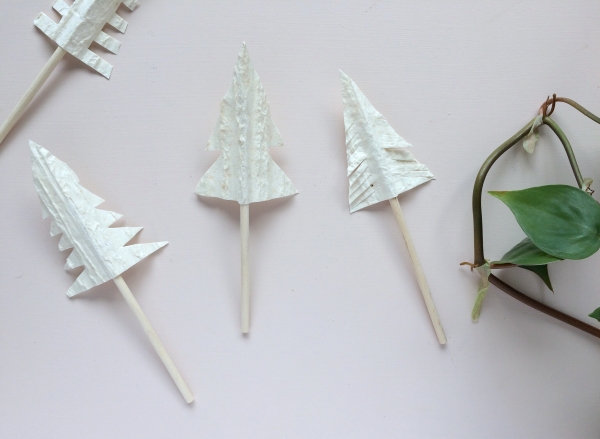
Step Four. If you’d like to keep a clean and modern design, keep the triangles plain. However, if you’d like to play around with sizes and shapes, trim and cut your triangles to vary the designs.
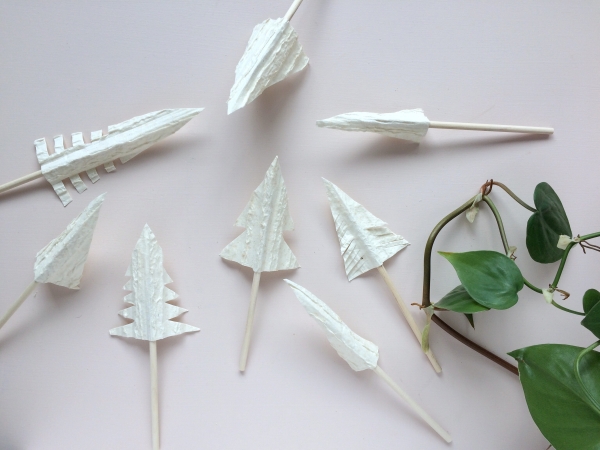
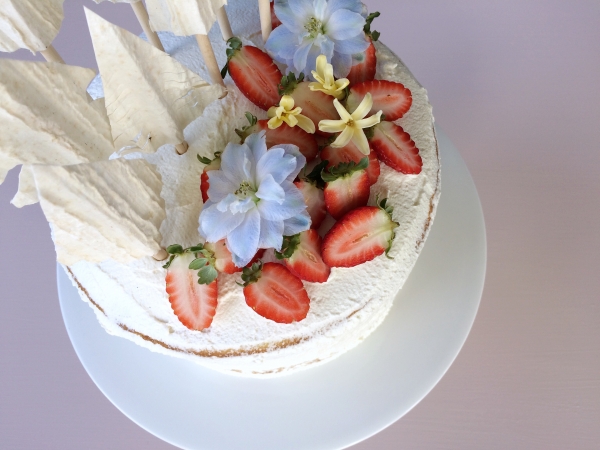
Step Five. That’s it! Grab your freshly baked and iced cake (yum!), and pop your trees on to create a gorgeous forest. Add flowers and fruit if you like, or keep it simple. Your guests will love the styling, and you’ll love how easy it is!
![]()


Join the conversation