

Choosing the favours for your wedding is a great opportunity for you to incorporate a little bit of your personality and style into the celebrations.
For today’s tutorial, I wanted to create a favour that would be universally enjoyed, simple to create and of course, look lovely too! Believe me, nothing quite says ‘thank you for sharing our day’ like a sweet little package of salted caramel fudge. This fudge is deliciously chewy and the pretty packages are the perfect way to make a bold style statement when it comes to your wedding tablescape. For very few ingredients and materials, you can make a thoughtful, personal thank you for your guests that you know they are going to love.
You Will Need:
For the Salted Caramel Fudge
2 x 395g tins condensed milk
250g unsalted butter
2 cups dark brown sugar
Himalayan salt flakes
33cm x 23cm baking tray lined with baking paper
Cooking (sugar) thermometer (not vital but definitely helpful when making multiple batches)
Each batch will make enough fudge for eight favours (four pieces each parcel). Repeat the process for how many favours you need to create. Fudge can be made up to one month in advance if kept in an airtight container in the refrigerator.
To create the favour parcels
Baking paper
Sticky tape
Scissors
Contrasting wrapping papers (I used a peony print with brown paper)
Grosgrain ribbon
Jute twine
Cardboard in complementary colour to wrapping paper
Hole punch
Inky black pen
For the Salted Caramel Fudge
Step 1. To make the caramel fudge, place all ingredients in a medium-sized saucepan and stir over a low heat until butter has melted and sugar dissolved.
Step 2. Bring the saucepan to the boil, continuing to stir always.
Step 3. Reduce heat to a simmer and continue stirring for approximately 12-15 minutes or until you notice the caramel darken slightly and the mixture become ‘sticky’. If you are using a sugar thermometer, the optimum temperature for the fudge to reach is 1150c. Refer to the hints and tips section below for further advice on how to know the fudge is ready.
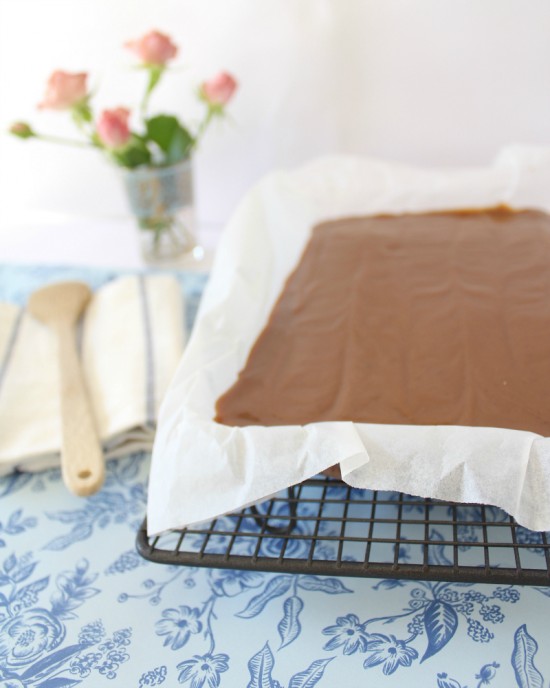
Step 4. Pour into the lined pan and allow to cool at room temperature, before placing in the fridge to cool completely.
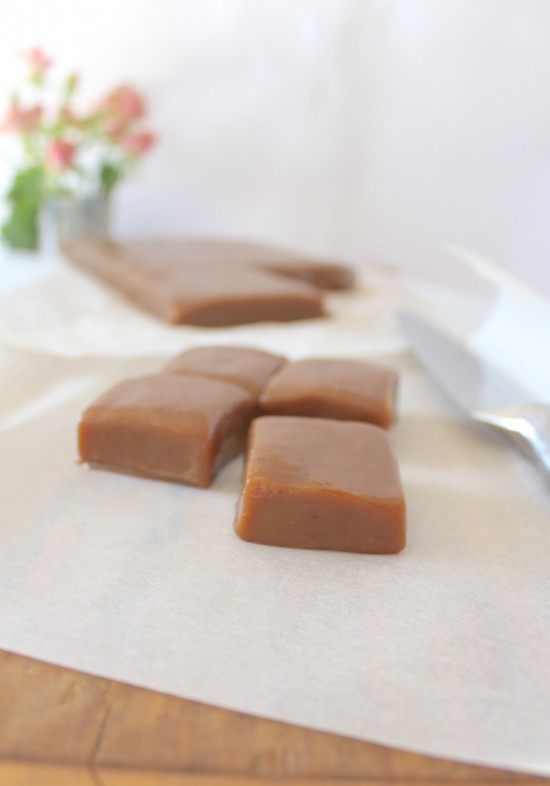
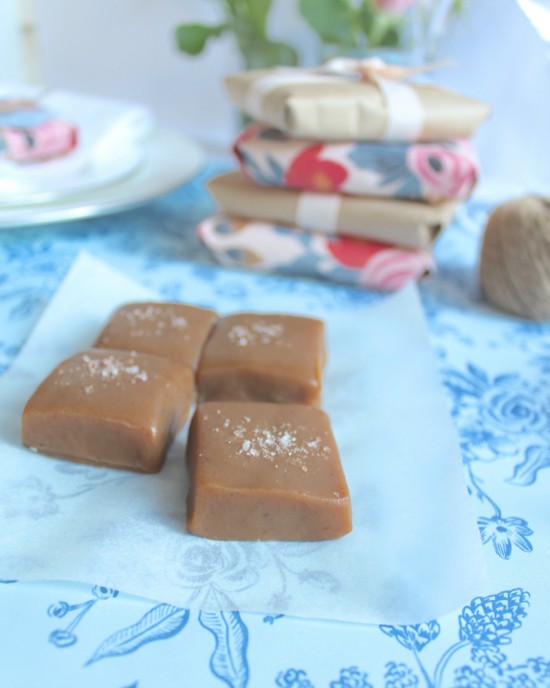
Step 5. Once cooled, lift fudge out of the tray and use a large knife to trim edges so they are nice and straight. Cut fudge into eight large squares and separate.
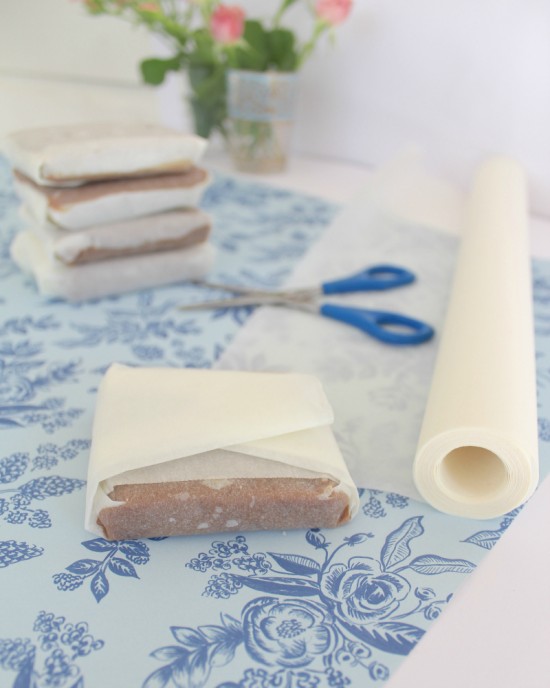
Step 6. Cut eight squares of baking paper large enough to wrap each piece of fudge. Place one square of fudge onto the baking paper and gently cut into four pieces, keeping the pieces tight together. Sprinkle each piece with a small amount of sea salt. Wrap in baking paper and put aside. Repeat for remaining fudge.
To create the favour parcels
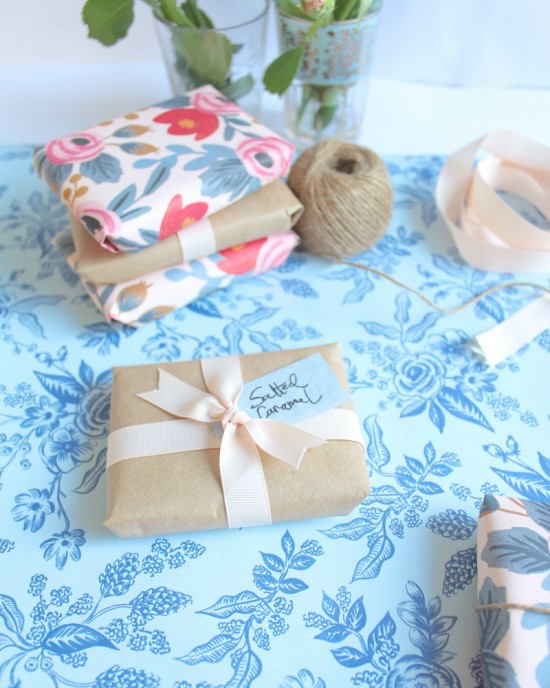
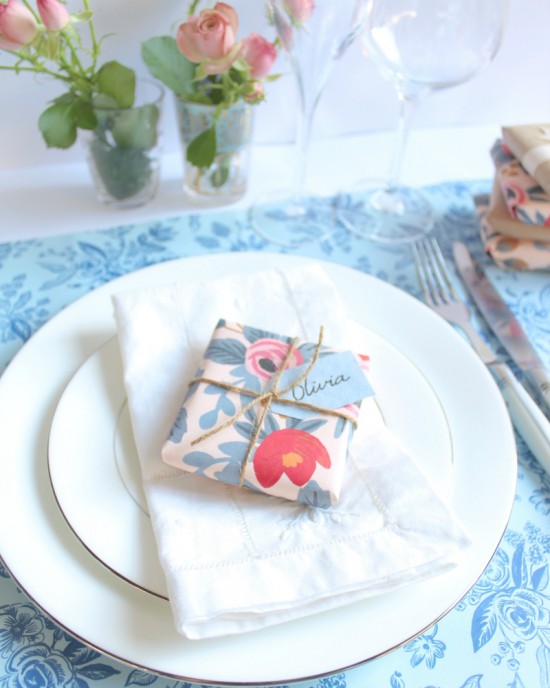
Step 7. Using your selected wrapping paper, wrap each parcel of fudge with paper, folding neatly at the corners and securing with sticky tape.
Step 8. Use the grosgrain ribbon to tie the brown paper packages and the jute twine to tie the patterned packages.
Step 9. Trace the shape of tag you wish to use (I used small rectangle swing tags) and cut as many tags as you require. I used a small hole punch at the top of each tag to fasten to the ribbon or twine.
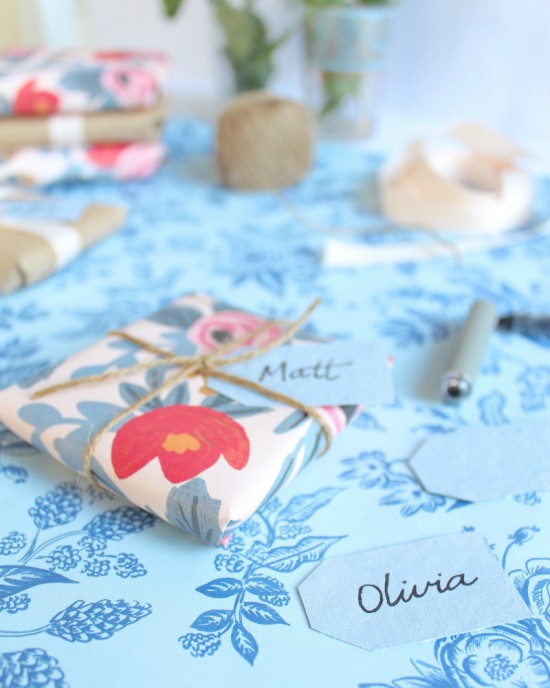
Step 10. Either label the fudge packages with ‘Salted Caramel Fudge’ or if you wish to use them as a placecard, include your guest names.
Step 11. Attach swing tags to the tiny packages and voila! Beautiful, thoughtful, handmade – and delicious – favours for your wedding guests.
Other Hints & Tips:
- If you don’t have a sugar thermometer, do not fear! As long as you are patient and wait for the change in colour, notice a change in consistency and wait at least to the 12 minutes of stirring. A good way of testing whether the fudge is at the right consistency is having a glass of ice and water next to you. Once you think the fudge is ready, use a teaspoon to drop a small ball of mixture in. The mixture should form a soft, flexible ball in the iced water.
- I’ve used dark brown sugar for a richer flavour but regular brown sugar works perfectly fine with this recipe. The colour and flavour will be slightly lighter.
- The fudge cuts best when it is cold, so make sure you allow it to cool for sufficient time before handling. If you leave it in the fridge for a few hours, or even better, overnight, you will thank yourself when the fudge is easy to handle.
- Be bold with your wrapping paper choices! Try something contrasting to your wedding décor to really make a statement. A bold black and white stripe is always chic or something floral if your style permits.
![]()
Ms Chinoiserie Says: So yummy – a handmade treat is a really lovely way to say thank you to your guests!
About Jess Bauer: Hi, I’m Jess and I’m a writer. I am a lover of words and stories, pretty papers and flowers. I find great satisfaction in creating something beautiful from the simplest of materials and am happiest in a home bustling with conversation and music, sitting at a beautifully decorated table surrounded by good friends and delicious food – with a glass of champagne in hand, of course!


Join the conversation