


Last month I discovered a fancy new machine I never knew I needed- the Cricut (pronounced like the insect!). This little machine works with Cricut’s program Design Space to create – well, anything you want! The machine works with a teeny tiny blade that allows you to cut over sixty materials including vinyl, foil, paper and even leather .
I don’t think I understood its potential until I started playing with it. Suddenly I can make cards instead of rushing to the store, I can customise t-shirts as gifts, I can cut a name out of vinyl, add it a notebook and turn it from a boring present into something personalised.
So you can imagine, the kinds of amazing ideas you can bring to life for your wedding day and I am delighted that we are able to partner with Cricut in their new wedding campaign “It’s Your Story, Make it Personal”.
Over the next four weeks, Polka Dot Bride along with a host of other wedding bloggers will be creating Cricut tutorials to inspire stunning projects for your wedding day (and show just some of the amazing ways Cricut can be used to personalise your day).
And to celebrate, Cricut has four weeks of incredible giveaways up for grabs! Every week there are new prizes – from amazing colour printers for your wedding projects, Cricut goodies, to flowers! There are new prizes every week and entry is as simple as heading to their blog and filling out their form (and yes, the competition is open to Australians!) with all entries going into the draw to win the amazing grand prize (which includes not only every prize from the competition but also a decadent Caribbean honeymoon!)
This week you can win a $1500 gift card from eco-friendly, handmade dress label Cecilia Grace who produce beautiful gowns that not only are made from natural fibres but are also designed to be as socially and environmentally conscious as possible. So head over to the blog to enter.
For my first project, I knew it had to be sentimental – as that is who I am at my very core!
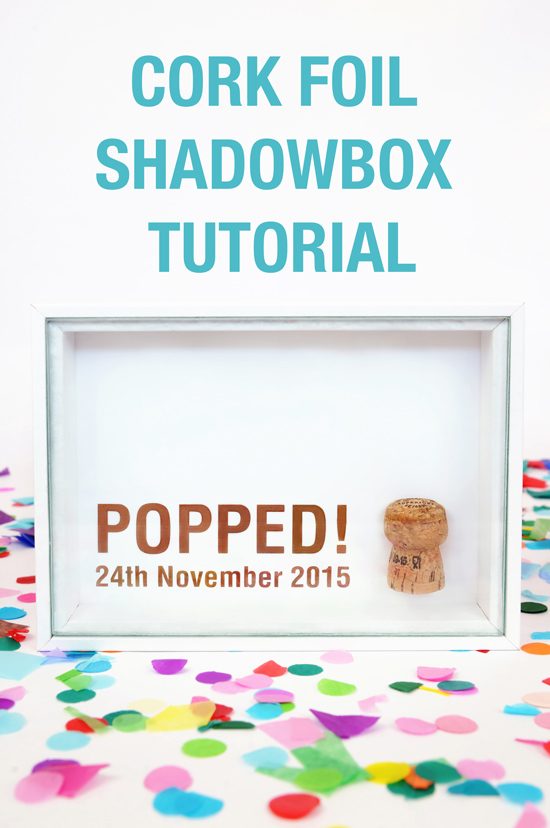
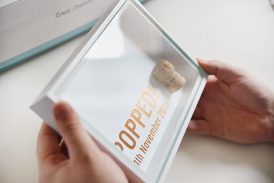
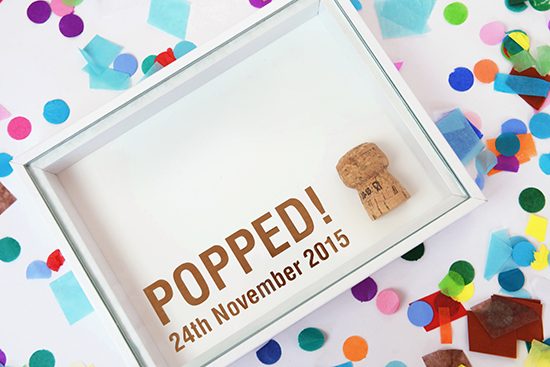
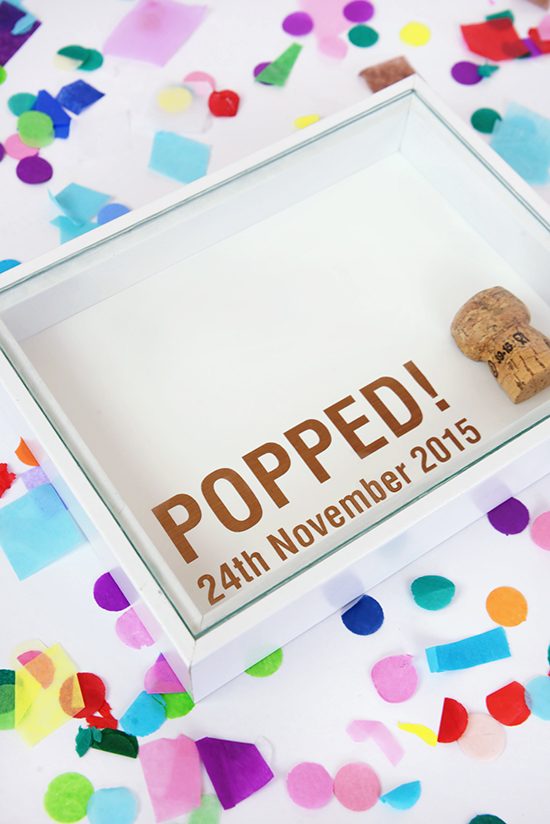
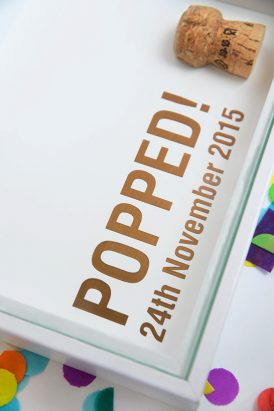
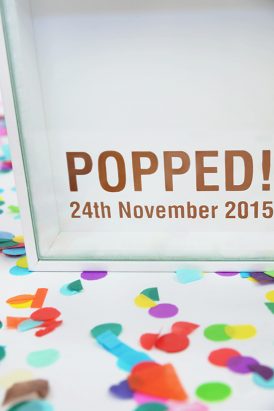
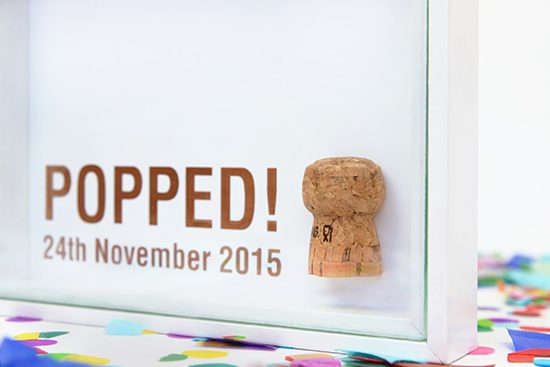
One of my favourite things to do is to save the corks from different important occasions, and to me, there are few more special corks than those of your engagement. I love the idea of preserving those memories in a very special way.
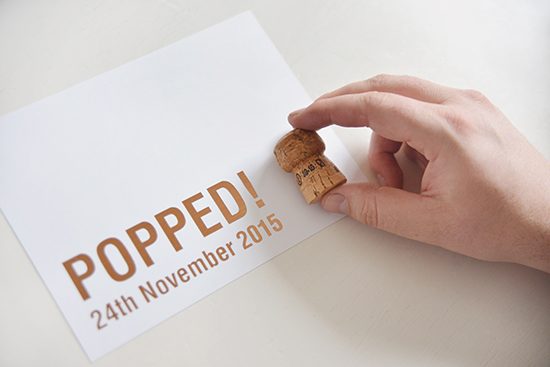
This copper engagement cork shadowbox is a fun way to keep this little memento of the day you got engaged and isn’t just for your engagement – save a cork from your wedding day too!
We’ve created a free download, which you can import right into your Cricut Design Space and customise for your date and frame size. Along with step by step instructions for creating this shadowbox yourself!
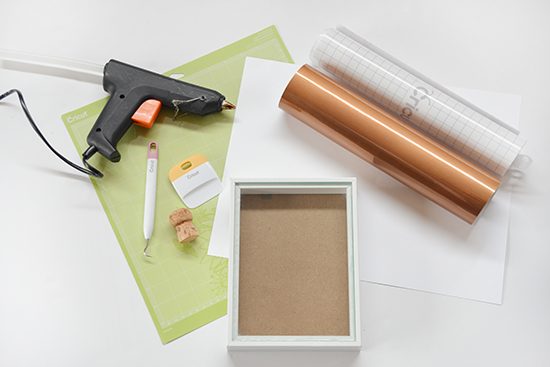
Supplies
- Your cork
- Our free download
- A shadow box frame
- White cardstock
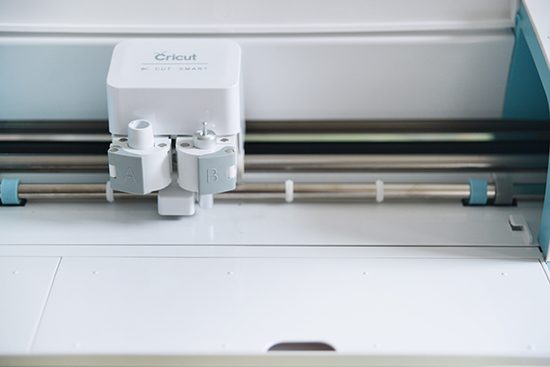
- Cricut Machine
- Cricut 12×24 Cutting Mat
- Cricut Adhesive Foil in Copper
- Cricut Transfer Tape
- Cricut tools
- A hot glue gun or adhesive of your choice.
1. Prepare your backing
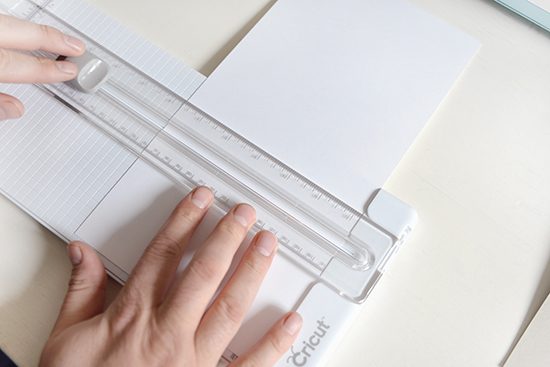
Ensure your backing is cut to the size of your shadow box and cut with scissors or a paper trimmer.
2. Customise your design
We’ve created a free download, which you can import right into your Cricut Design Space and customise for your date. Once imported, be sure to size to your frame measurements, and type your details using Helvetica Bold Condensed.
Your design size will depend not only on your frame size but also your cork size – wider corks will require you to adjust the width of the design.
For a 6×8 inch frame and a fairly standard cork, our design was sized to 5.7 inches high and 2.7 inches wide.
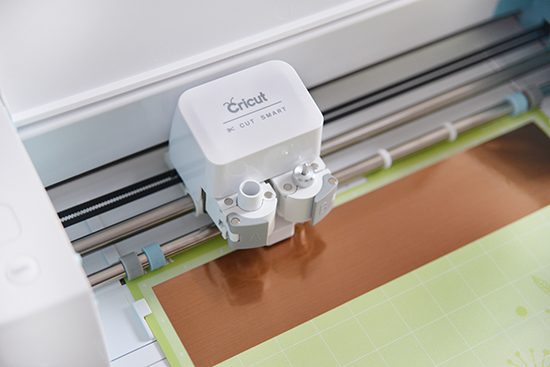
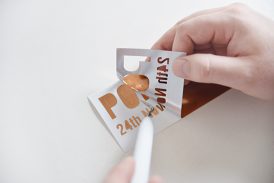
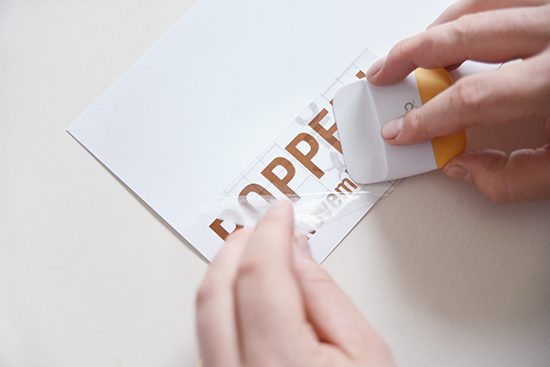
3. Cut & weed
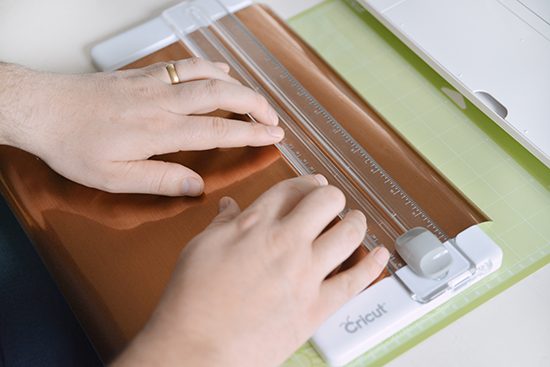
Cut your metallic foil to size with scissors or a paper trimmer.
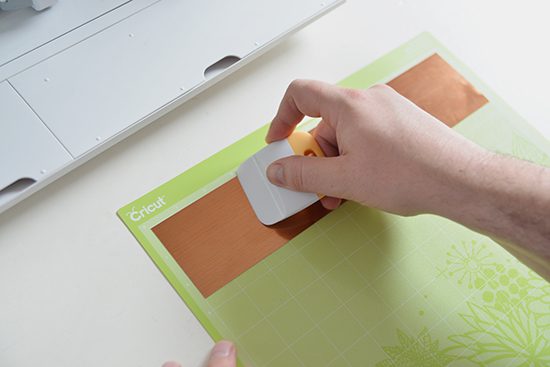
Lay your adhesive foil side up on your mat and burnish using your scraper tool. Load into your machine and cut!
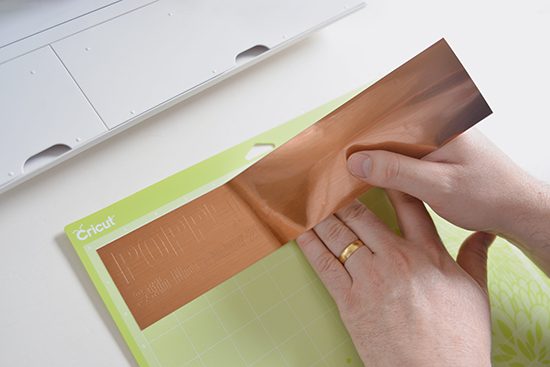
Once cut, carefully use your weeding tools to weed the background away from your letters. The adhesive foil is very delicate so being slow and cautious is a must!
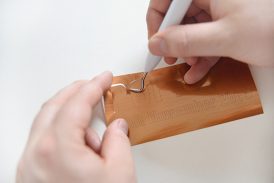
4. Apply transfer tape
Once you have removed all the pieces from your design that you don’t need, cut a piece of transfer tape to size and carefully smooth on, burnishing down with your scraper tool.

Ensure there are no air bubbles and carefully smooth the transfer tape along the design.
Carefully lift the transfer tape back up, rubbing the design carefully to ensure nothing is left behind.
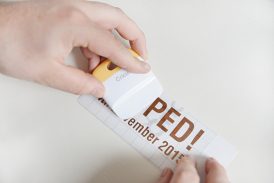
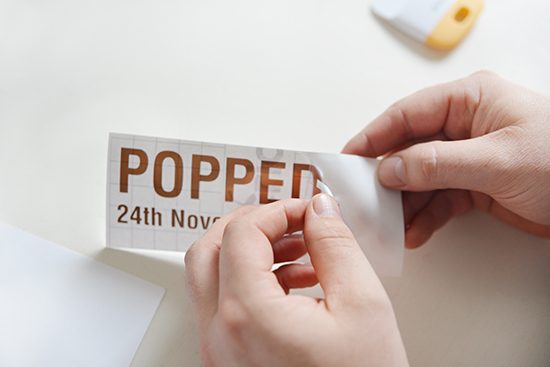
5. Attach the design to your backing
Place your design gently onto your backing card to ensure you are happy with the placement. Remember shadow boxes often have a slight border to hold the glass in place so ensure you don’t stick the design right on the edge, For this shadowbox, we chose a left alignment, leaving enough room for our cork.

Once you are happy with the placement, rub the design onto the card with your scraper tool and gently remove the transfer tape.
6. Glue your cork
Depending on your cork, you might like to take a sharp knife and carefully slice the back of your cork so fits within the shadow box and sits flat against your card backing.
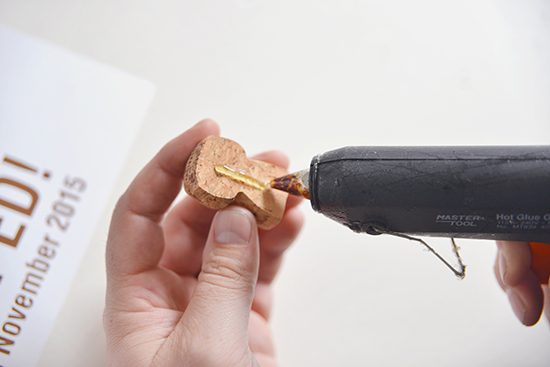
Once you are happy with the size, use hot glue and stick into place. For extra stability, glue your white card to the backing board of the frame.
7. Assemble
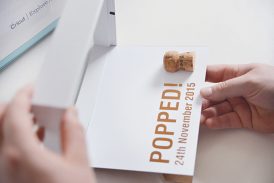
This DIY project is so easy, the finishing step is literally to place the card into your frame and enjoy!
Head on over to Cricut’s blog for this week’s contest! They’re partnering with beautiful handmade wedding gown designer Cecilia Grace and giving away a $1500 credit for the gown of your choice. All entries go into the draw to win the grand prize at the end of the month
We have another gorgeous Cricut project for your wedding ceremony coming up very soon!
![]()
This post is part of our paid partnership with Cricut. Thank you Cricut for delivering us this fabulous machine and giving us the tools we need to create fabulous wedding projects!


This is such a unique idea. I love it!
Love this, especially for wine lovers! They could create a chic gallery of these!
Such a fun memento for the proposal!