

Hanging decorations are a great way to make a large statement at your wedding without breaking the bank. The thing is, when it comes to creating large visual focal points at your wedding that are not floral based, it can be difficult to know where to begin.
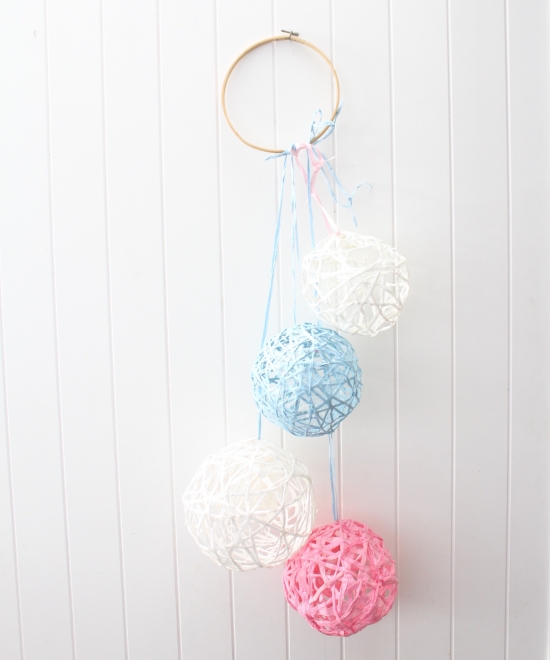
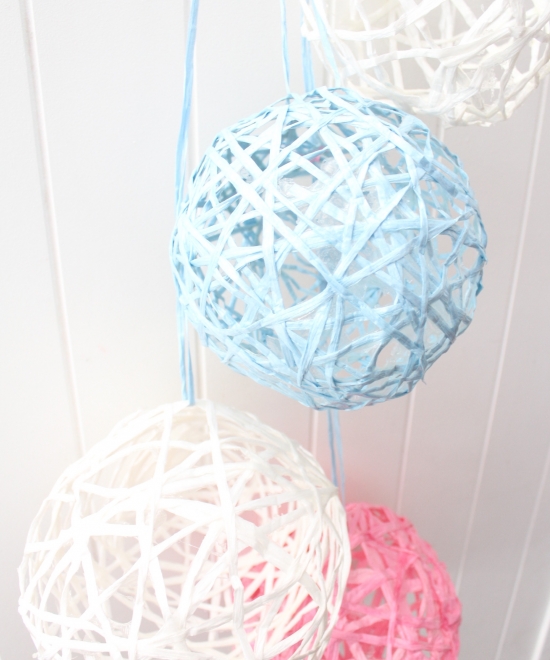
This tutorial to create a gorgeous twine sphere decoration involves a simple process that can be recreated with different materials to produce varying results. I love how bright and playful this decoration is. It would look gorgeous with four of them hanging behind a bridal table or hanging above the dance floor as a chandelier.
Make sure you don’t restrict yourself to the exact directions listed below. Once you master the process, have a play with different mediums to create the exact look you want. I’ve seen beautiful large-scale jute twine balls filled with fairy lights, or smaller ribbon globes which are perfectly sweet and dainty for a bridal shower. So set some time aside, and be ready to get a little messy. I promise, the finished product is worth it.

What You’ll Need:
Balloons
Raffia (for this project we used 25mt of white, 15mt of blue and 15mt of pink)
Craft glue (approximately 350ml will be required for 4 small to medium sized spheres)
Petroleum jelly
Container to mix raffia and glue in
Glass or bowl (to sit your balloon on while you are working on it)
Chopstick
Ribbon, twine or leftover raffia to tie finished spheres
Ring to tie spheres onto (I used an old embroidery hoop)
What To Do:
Step 1. Blow up your balloons to their desired size. It is a good idea to have varying sizes for contrast.
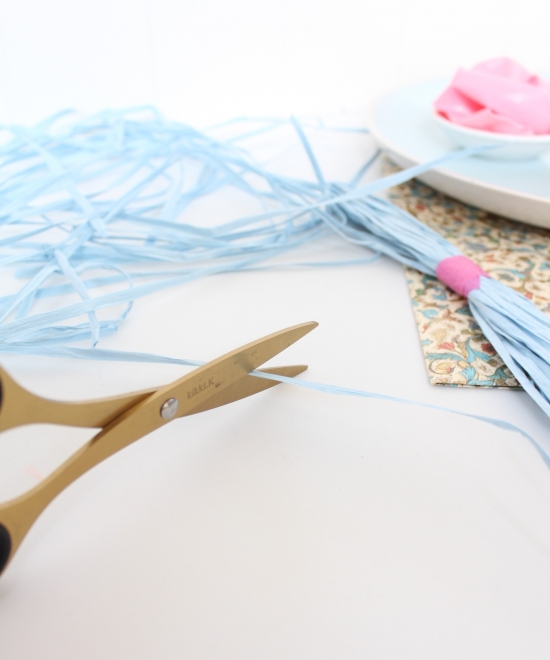
Step 2. Cut strands of raffia into 1 metre lengths. Approximately 15 x 1 metre strands will be sufficient for a medium sized sphere.
Step 3. Working with one balloon at a time, gently smear the petroleum jelly over the balloon. This will help to make sure with the twine doesn’t stick to the balloon once its time to pop it!
Step 4. Using a plate or container, empty approximately half a cup of craft glue and place the raffia strands in it. Using your hands, make sure all raffia is well coated with glue.
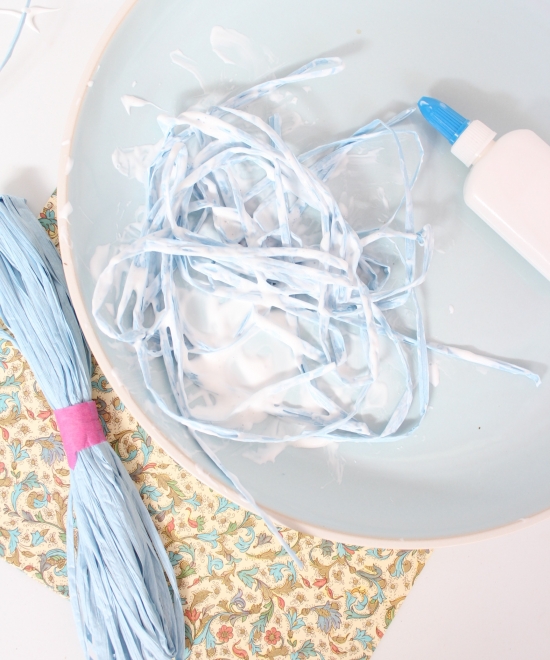
Step 5. Working slowly, wrap each piece of raffia around the balloon. The final effect should be random but ensure you paste the raffia both vertically and horizontally to ensure proper coverage.
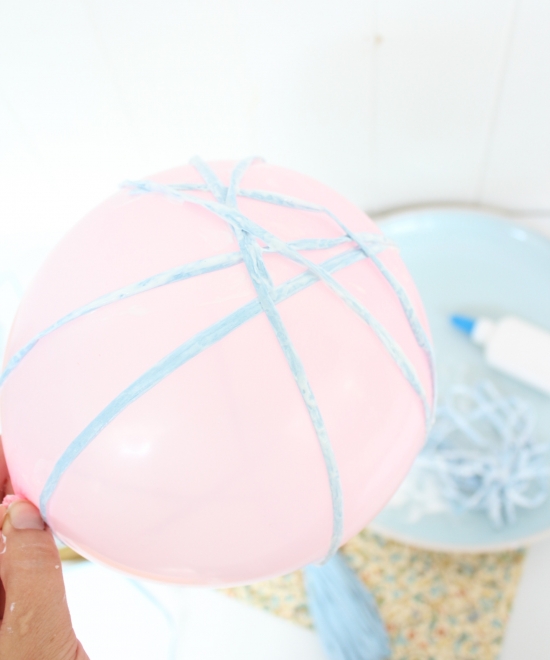
Step 6. Repeat until all raffia has been used. Use a cup or bowl to hold the balloon in between raffia wrapping motions.

Step 7. Once you are happy with the overall coverage and result, hang the balloon on an undercover clothesline or clothes horse and leave to dry for 24 hours.
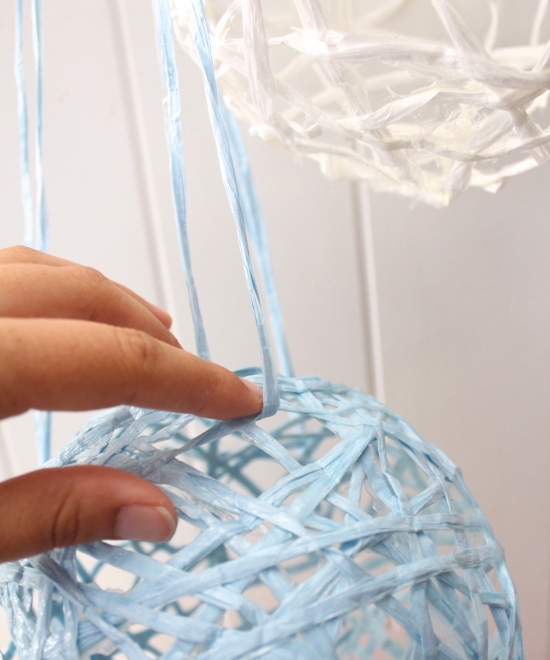
Step 8. Repeat Steps 3-7 for each balloon. Pop each of the balloons and use a chopstick to eliminate any excess dried glue that may exist.
Step 9. Using twine, ribbon or leftover raffia to tie spheres into formation. Tie them onto an embroidery hoop (or something similar).
Hints & Tips:
- Raffia is a great material to use for this project as it is inexpensive, sturdy and can be found in various colours. Try your local craft or material store and be as bold as you can with your colour choice.
- The quality of balloons you use will make a difference. Try to purchase helium quality round balloons for the best chance of project success.
- You can repeat this process with varying sizes of bases. The size of spheres you can create is only limited to your desire to create them. For example, this process using water balloons could create beautiful handmade Christmas baubles.
![]()
Ms Chinoiserie Says: Such an easy idea – and so effective; imagine the spheres suspended above the bridal table in a mix of chic metallics!


Join the conversation