

The thing I love most about wedding DIYs is that the very process of creating allows you to inject a little of your personality into the details; this can make for a wedding day that is truly ‘you’ and something that your guests will appreciate.
When creating these watercolour seating cards, I really wanted a feminine, whimsical way to greet guests as they arrived at the reception – which I think is perfectly conveyed by using a watercolour palate.
The following tutorial explains how you can introduce a similar ombre or watercolour palate into your event. Try colour combinations that you gravitate towards and that fit within the colour range of your big day: think pinks and oranges, blues and purples or varying shades of green. While we have created seating cards for this tutorial, the same process can be easily recreated for menus, place cards or event signage. And the best thing? It’s an incredibly budget conscious activity, with no specialised equipment required.
So, be prepared to unleash your creativity, enjoy the process and make something beautiful that reveals a little of yourself to your guests in the prettiest way.
What You’ll Need:
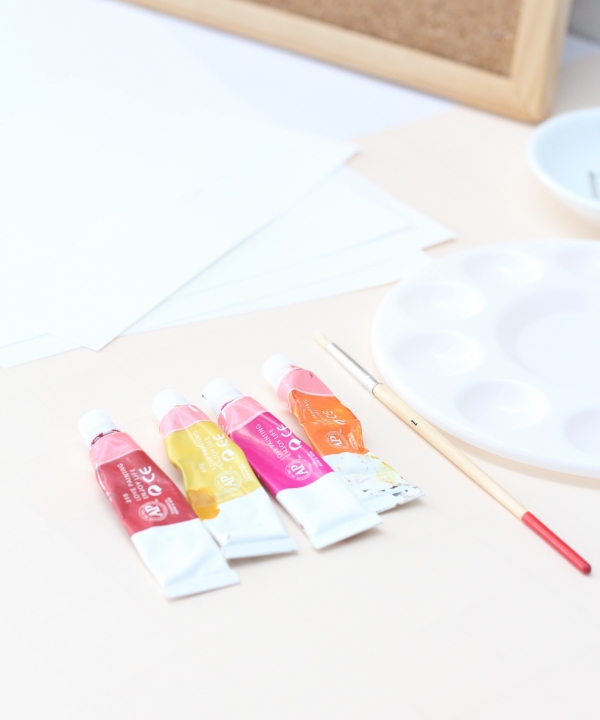
Good quality linen light card (I used 120gsm)
Computer and printer (or try your hand at calligraphy if you’re feeling brave!)
Watercolour paints in varying colours
Paint palette
Paintbrush
Water
Ruler
12 x fine sewing pins
Cork notice board
Wrapping paper to cover cork board (I found mine at Kikki K)
4 x cute thumb tacks
What To Do:
Step One. Firstly, cover the cork board with your chosen wrapping paper. Measure the cork board and cut a piece of wrapping paper to fit just inside the frame. Attach in corners with thumb tacks.
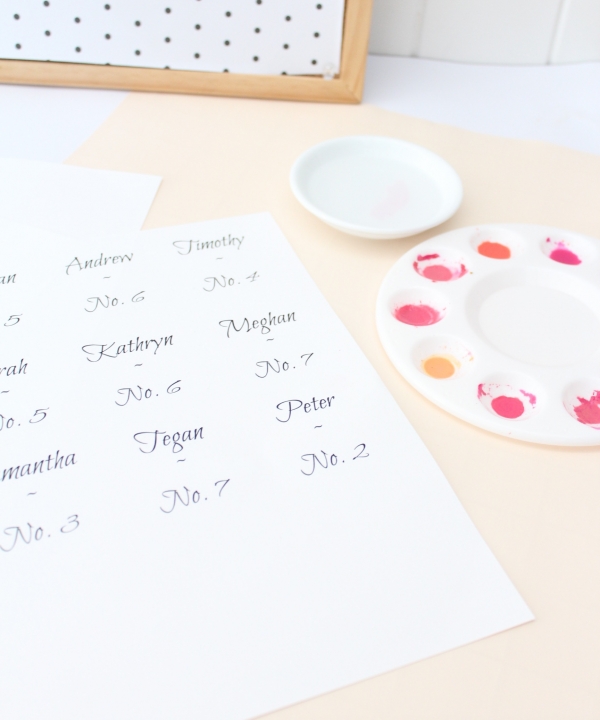
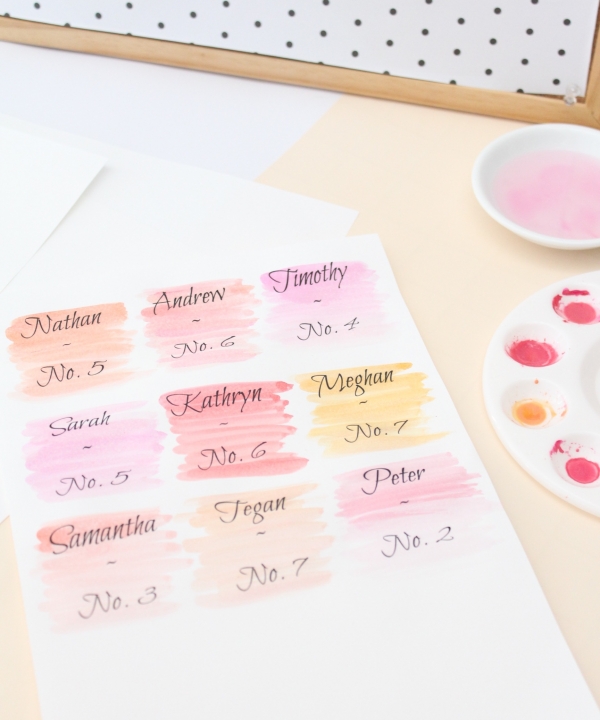
Step Two. Using either your word processor or an online picture program like PicMonkey, create text boxes with your guests’ names and table numbers. I used the font ‘Bilbo Swash Caps’ as it looks similar to hand calligraphy. You should be able to create 12 x text boxes per A4 page. Print onto your light linen card.
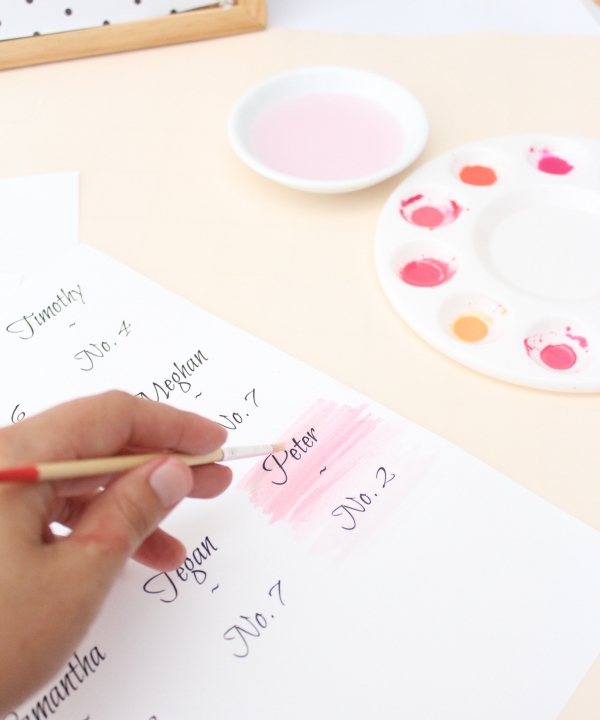
Step Three. Put a little of each of your chosen colours onto the paint palette. Using the water and mixing the colours together, create a selection of colours in varying shades. Enjoy this process! Try different combinations by adding white or water to create a palette that you really love. Taking your time, gently brush over each name and table number with even, horizontal strokes. Be sure to leave room either side as a border. Allow to dry.
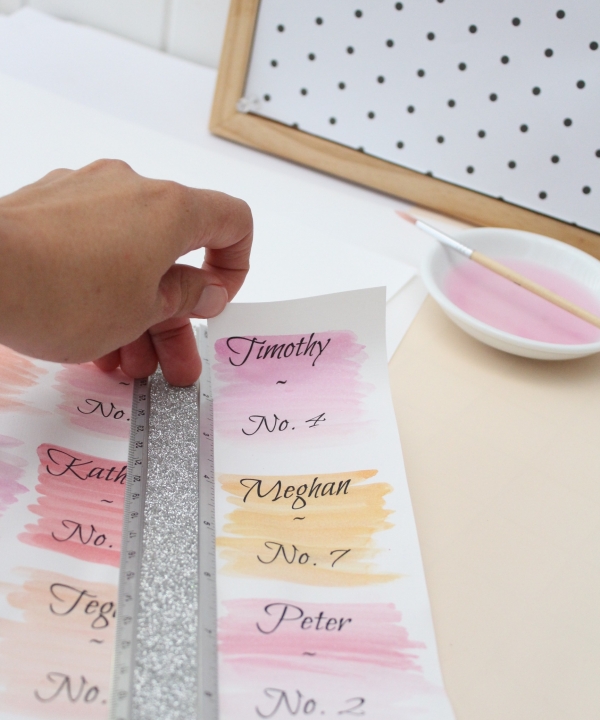
Step Four. Once dry, use a ruler to tear three long strips. Then carefully tear each place card. Be sure to tear the outer edges also so all four sides of the card are uniform. The soft edges really lend themselves to the romantic watercolour, but you could always use scissors or a guillotine for a smooth edge.
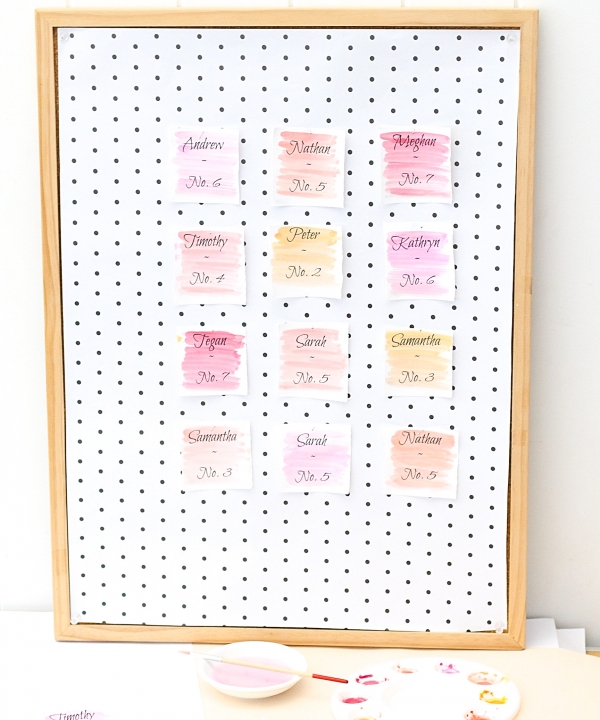
Step Five. Using the pins, attach each card to the notice board in a grid pattern with approximately equal space between each card. Take your time with this step as the precision of the layout will affect the final look.
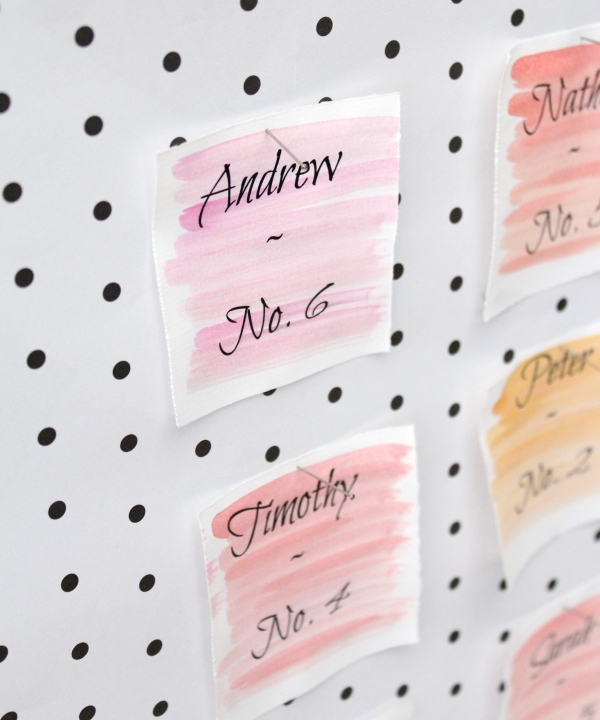
Step Six. The seating cards are now ready for display! Place the notice board in a prominent position for guests to find their place as they arrive at the reception. You could always display multiple noticeboards if necessary, or one smaller board for each individual table if it suited.
![]()
Ms Chinoiserie Says: I love the whimsical water colour effect; so pretty and such a lovely way for guests to be welcomed to your wedding celebrations.


Join the conversation