

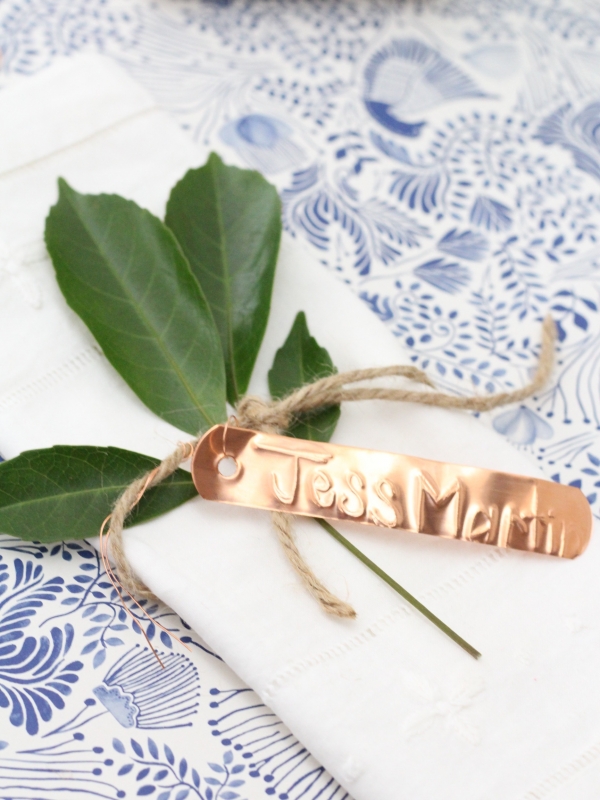
When it comes to wedding decor, inspiration can arrive in so many different ways. Sometimes I’m inspired by a wedding I have seen on Polka Dot Bride, flipping through Instagram or in the pages of a bridal magazine. Other times I’m inspired by other events I attend in person and think ‘that looks beautiful, I wonder how I could create a similar look or feel’. Then more rarely, I will see a product or an item which sparks my interest. For this tutorial, it was the latter. I was wandering through Bunnings picking up some seedlings and stumbled across these copper garden tags. How perfect for a wedding place setting, I thought, and promptly began to research ways they could be utilised. I have come up with the following tutorial which is as simple as they come. The most difficult step, is working out how to write your guest names backwards. Think of it as a good brain exercise! The finished product is particularly lovely. These name tags are the perfect injection of bling to a wedding place setting, and as DIY tutorials usually are, worth more than the sum of its parts.
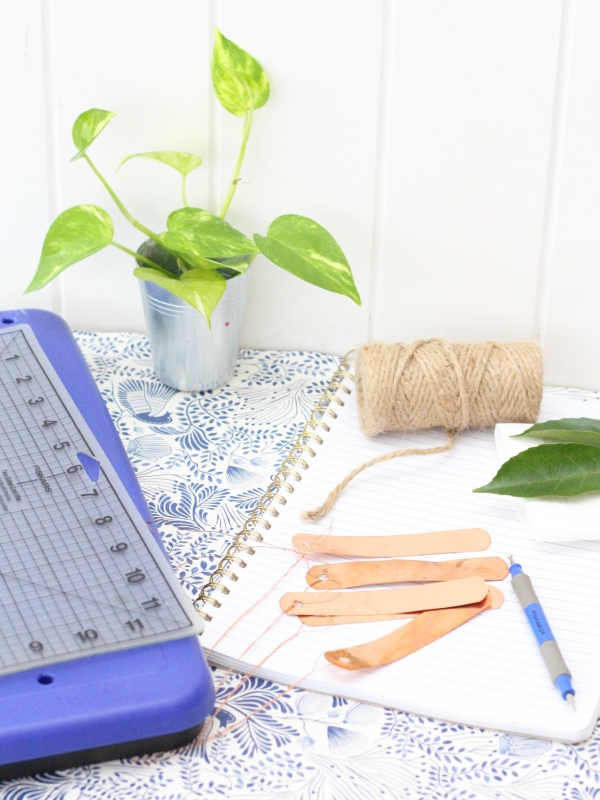
You Will Need:
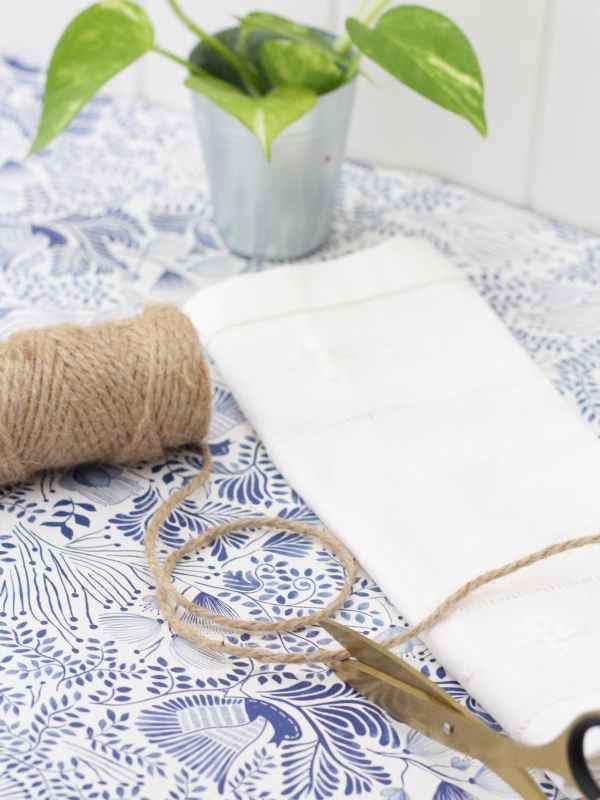
A craft mat or plastic placemat
Paper and pen
Copper garden tags (we found ours at Bunnings)
Embossing tool (we used a Fiskars one)
Twine
Greenery – for place settings, depending on wedding florals
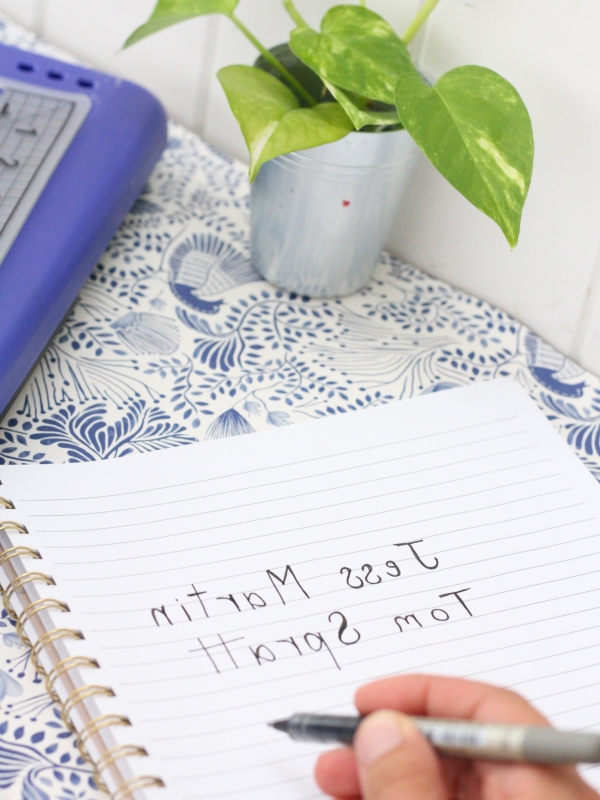
Step One. As mentioned in the intro, this is the most difficult step in the whole tutorial! Working out the reverse of the name you are writing can take time. A good hack would be to print out your names in clear font onto transparent paper then simply flipping the paper over and copying. Or, like me, take your time, and really think about it, and write your guest names backwards. It may be easier to write first names only on the copper place cards but include surnames on your seating arrangement chart to avoid confusion.
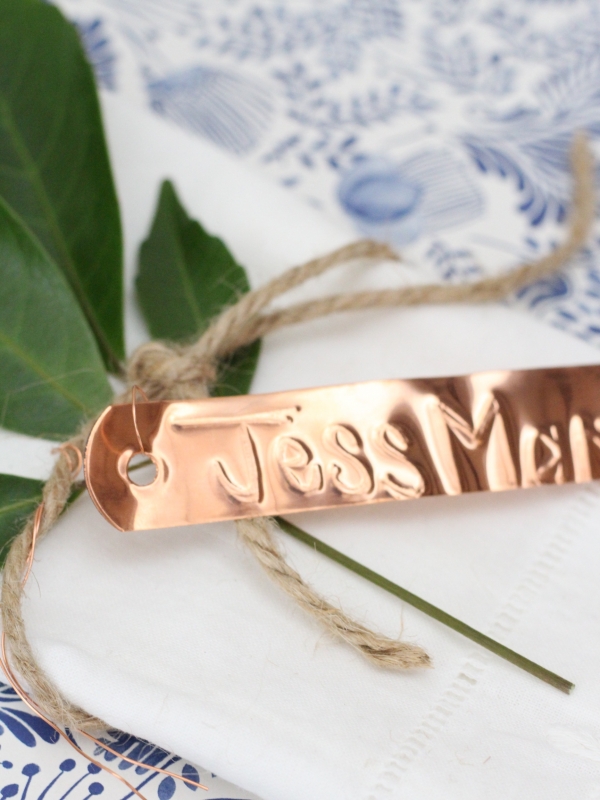
Step Two. Place your craft mat (or place mat) onto a hard, flat surface. Use a pencil to lightly write on the copper tag your guest name backwards. Whether you decide to write from the ‘tag hole’ end or the rounded end is up to you but make sure you keep it consistent.
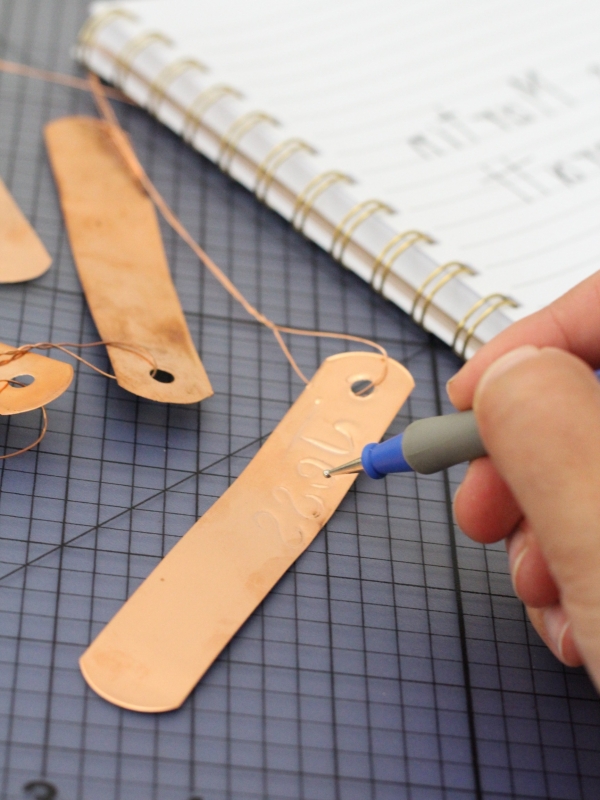
Step Three. Using your embossing tool, follow the traced name. Go over it two to three time to make sure it really ‘pops’ when you turn it over.
Step Four. Tie a single or double piece of twine around your guest napkin. Use the pre-set wire loop to fasten the copper name tag to the twine.
![]()
Ms Zigzag says: I would find these name tags very therapeutic to do by hand, and they look great!
About Jessica Derrick: I’m a writer and a lover of words and stories, pretty papers and flowers. I find great satisfaction in creating something beautiful from the simplest of materials. I’m happiest in a home bustling with conversation and music, sitting at a beautifully decorated table surrounded by good friends and delicious food – with a glass of champagne in hand, of course!


Join the conversation