


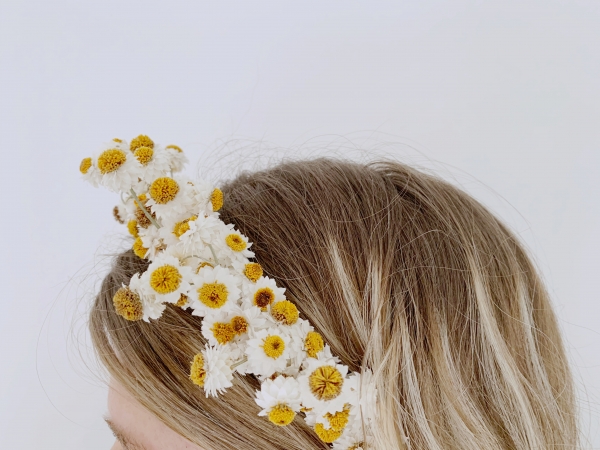
I made this dried flower headband on a whim for a wedding recently, then promptly left it at home! Apart from counting the days until the next function where I can wear it (and I’m mum to a two year old, so it’s unlikely to happen anytime soon), I needed to share this tutorial with you! It’s so very simple, and is an on trend way to incorporate hair flowers. Styled with boho waves and lace gowns or sleek and shiny hair with a satin slip, this floral headband is a keeper! Just don’t forget to actually wear it…
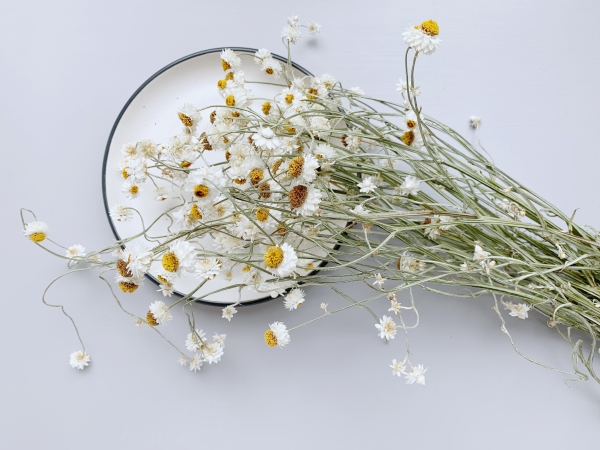


You can buy dried flowers from florist stores, or you can buy fresh native daisies (as I have), and dry them. If you’re going to dry the flowers, buy them approximately two to three weeks before you plan to use them, leaving them out of water in a cool and dry location. Variations of everlasting daisy are perfect for this project, but you can use almost anything! Coloured and dried hydrangeas are currently abounding in arrangements, and if you were to snip off each individual flower you’d have a brightly coloured option.
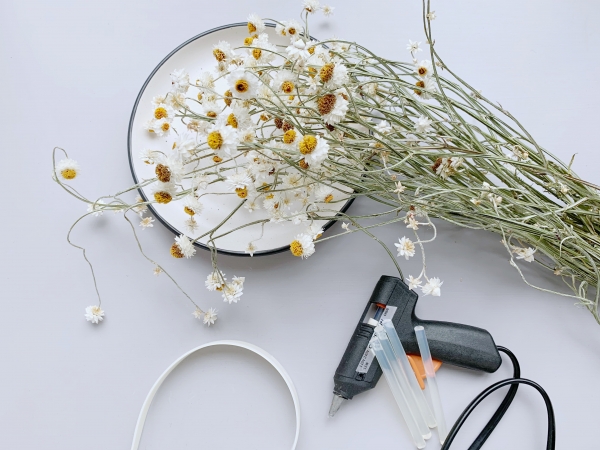
What You Will Need:
- 3-4 bunches of flowers (dried or to be dried) per headband
- Wide headband (I found this one in Kmart, and removed the fabric cover)
- Hot glue gun and glue sticks
- Scissors and drop sheet/paper
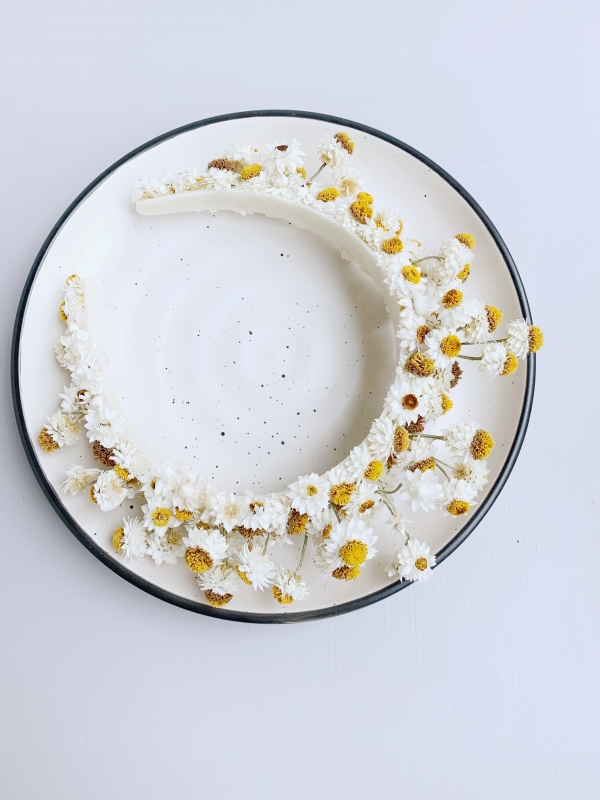
Step 1. Gather all of your materials, and using a plate or bowl, begin to cut all of the flower heads off the stems. Cut as close to the flower head as possible, creating a flat surface on the flower, making it easy to adhere to the headband. You’ll likely need a lot more than you realise, so keep snipping! Cut about 20 stems with longer stems, and set aside.


Step 2. Plug in your hot glue gun, and wait until it’s warm. Remove any fabric or covering from your headband, and wipe clean. Working in very small increments (the glue dries very quickly), begin to carefully and quickly place flower heads onto the headband with the glue. Cover all of the headband.


Step 3. You can leave the headband at this stage, if you like the design. However, if you’d like to give the floral headband a little more impact, you can create height. Using the hot glue, place a blob in the centre of the band, fastening some longer stems in. Secure these by gluing two or three flowers around the base. Continue making small clusters along the headband, checking the design as you go.


Step 4. Remove any straggly glue pieces, and check the headband over for any gaps. Dried flowers last forever, so this gorgeous floral hairpiece can do the same!


![]()
Ms Floral Says: So, so pretty! Ms Honeycomb, you are just too clever. I think these gorgeous floral headbands would would also be super fun to make at a bridal shower or hens day.
About Ms Honeycomb: My heart and home in Scotland and Australia, I am a florist, flower lover, writer, baker, stylist and sew-er of lovely things, with my darling toddler forever keeping me on my toes!
![]()


Join the conversation