

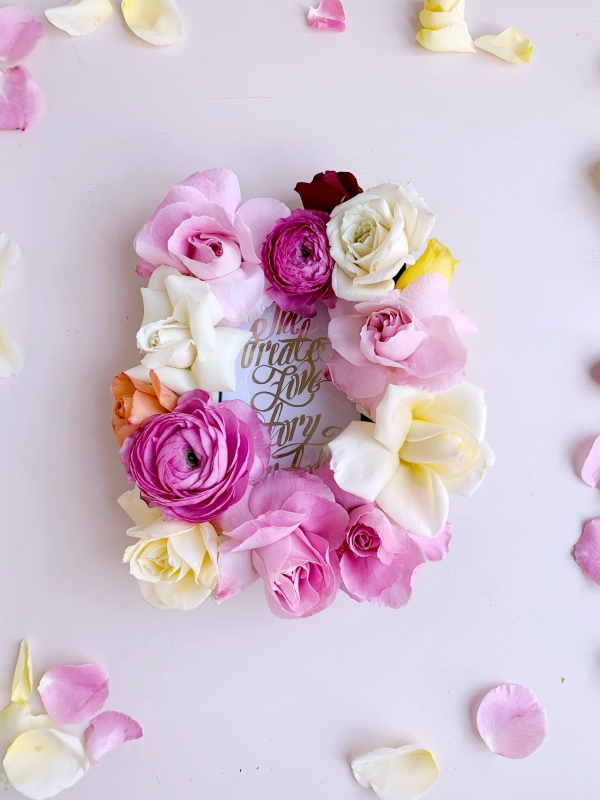


Whether you’re a lover of detail, or a lover of flowers (and foliage), a floral frame to display your precious photos in is perfect for you! Our DIY tutorial will take you through step by step on this bloom filled project that may not be the quickest or easiest, but is most certainly worth it!
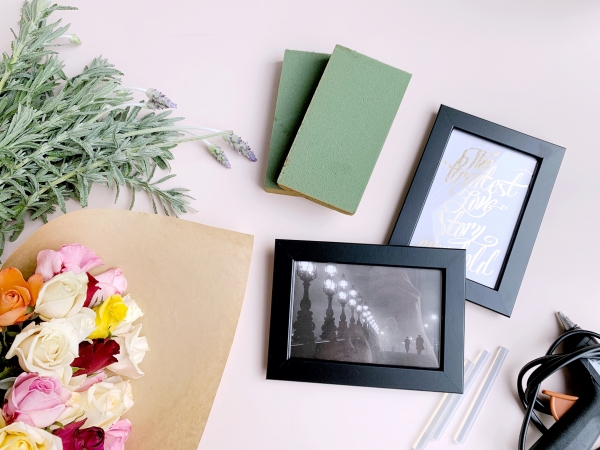
What You Will Need:
- Photo frames with a flat surface, that aren’t precious. The FISKBO range from Ikea are perfect!
- Hot glue gun
- Floral foam (Oasis)
- Shallow dishes, floral scissors, sharp knife
- Flowers of choice. The thinner and hardier the stems and the smaller the flowers, the easier this project will be (ie Geraldton wax)
Step 1. Grab your hot glue gun and plug it in to warm up. Pop your chosen photograph into the frame, using a photocopy if the original is precious (it will likely get wet). Using a sharp knife, cut strips of oasis to fit your chosen picture frame. Make sure they cover the width of the frame, and are approximately 1-1.5cm deep. Working quickly, stick the oasis onto the frame, pressing firmly. Allow to cool and dry.


Step 2. Using one shallow dish, fill with water approximately 2cm deep, and lay the frame over the top. After a few seconds, lift it gently out, and place front face down into a second dish, to properly take up the water. In choosing flowers, you need very thin stems that are hardy. As there is hardly any depth of oasis on the frame, we want light flowers that don’t need much to anchor them.


Step 3. Collect your chosen blooms, and make easy work of the stems by snipping off the heads of each flower. Remove any foliage around the head of the flower, and cut the stem neatly on an angle, leaving a 2cm stem. If you’re using garden roses, reflex the petals to open up the bloom.


Step 4. Carefully begin placing the flowers into the oasis. Try to only place a flower once, rather than removing it and trying different spots. As there is little depth of oasis, it will be fragile. Cover all of the oasis, then tip the frame gently to the side, to release any water.


Step 5. You can create a foliage covered picture frame using the same method. Ensure the stems are short, foliage free and sharp, be gentle in your application, and you’ll be an expert in no time!


A flower covered picture frame is a dream detail! Keep in mind these won’t travel well, although they should last several days. For flower lovers and the romantics, this DIY is a gorgeous way to bring beauty to every inch of your celebration!


About Ms Honeycomb: My heart and home in Scotland and Australia, I am a florist, flower lover, writer, baker, stylist and sew-er of lovely things, with my darling toddler forever keeping me on my toes!
![]()


Join the conversation