

You may have seen these little guys popping up in cool stores recently filled with succulents at crazy prices? Well now you can make them cheaply and easily at home, you just need a little patience as the process takes a few days.
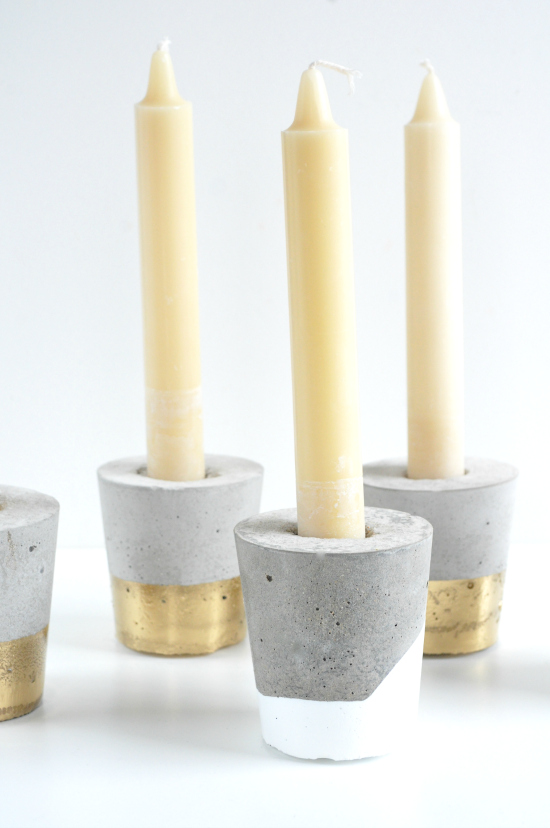
Of course you can change up the colours to suit your theme, but I am loving this gold and white combo at the moment.
These candles look great lined up or grouped together on a table, and you can even gift them to your guests as favours at the end of the night.

You will need:
– Protective mask.
– Bucket. Use one you won’t need again. You can grab these cheaply at hardware stores or supermarkets.
– Sand and cement mix. The smallest bag I could get was a 20kg bag from Bunnings.
– Water.
– Old wooden spoon or similar for stirring.
– Measuring cup.
– 6 x paper cups + extra for paint dipping. I used 250ml-capacity cups.
– 6 x long candles. I grabbed a heap of these cheaply at Ikea.
– Scissors.
– Paint in your choice of colours. I used a gold enamel paint and a white acrylic paint.
– Non-stick baking paper.
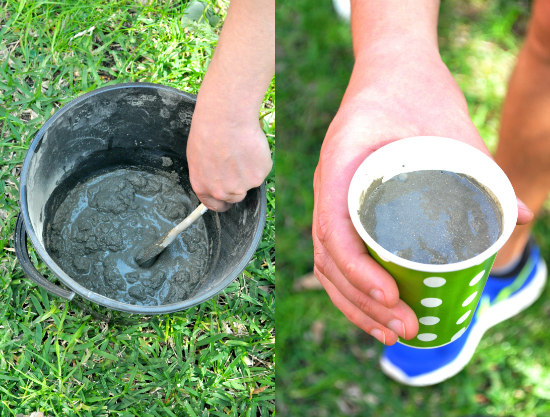
Wearing a protective mask, combine 5 cups of cement mix and 2 cups of water (this ratio may vary depending on your brand of cement mix, so check the packet) in the bucket. Divide between 6 paper cups. I recommend you do this outdoors so the area is well ventilated. Tap the cups on the ground to help remove any air bubbles.
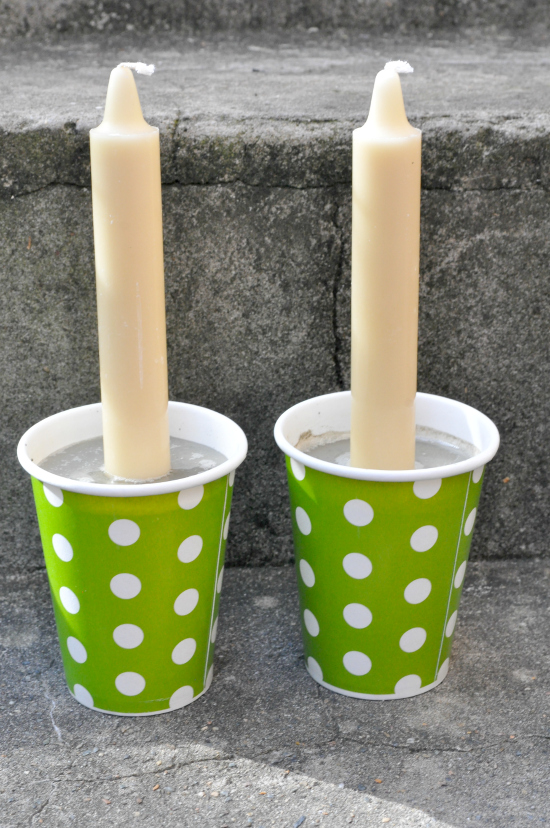
Place a candle into each cup. Twist down toward the bottom of the cement to secure the candle. Set aside on a flat surface for 3 hours. Give the candles a twist. Leave for another 3 hours or until firm enough that you can take the candles out and the cement will hold it’s shape. Remove the candles and set aside. There will still be some water on top of the cement but this will absorb as it sets. Leave the cement for at least another 12 hours, or until completely set.
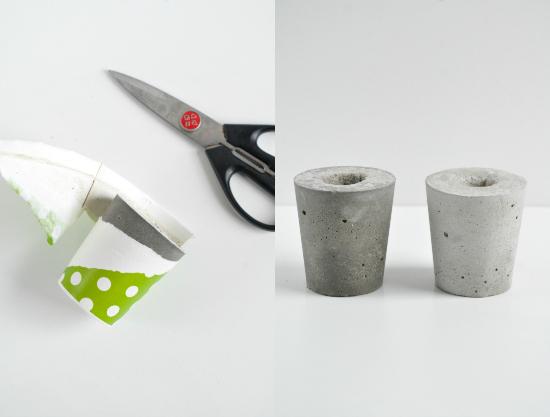
Once the cement has set hard, cut a slit in the side of each cup and then unwind the paper from the cement and discard. If there is any crystallised residue on the top of the holders, you can just brush this off.
Leave the holders to dry for at least 12 hours. In the above picture, the holder on the left is still wet, while the holder on the right is dry. You will notice that it changes colour to a lighter grey when dry.
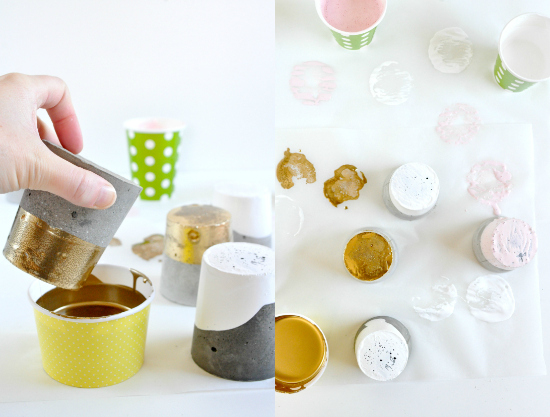
Pour the paint into the extra paper cups. Dip each holder into the paint, being careful not to brush against the sides of the cup as this will smear the paint. Allow any excess paint to drip off before placing on sheets of baking paper to dry for 24 hours.
I found that once most of the excess paint had dripped off I could dry the holders upside-down so they didn’t get a ring of dried paint around the base.

So there you have it, easy concrete diy candle holders! And because you removed the candles while they were still drying, you can use them again and again.
If you want to make more than 6 holders, the quantities can easily be double or tripled etc as you need.
Makes 6 candle holders.
Images and tutorial by emerald + ella
I’m Jane Howard, the girl behind emerald + ella – an online shop and blog which encompass a world of beautiful, eclectic things. I’m also a recipe writer, food stylist, vintage collector, New Zealander, married to an Aussie boy, aspirational crafter, wine drinker, pulled pork sandwich lover and basically just a girl who likes pretty bits and pieces.


Love this – very creative!
What brand/ type/ colour cement did you get from bunnings?
The one i purchased results in a quite porous looking candle holder!
Thanks, Alannah
May I ask please what brand is the gold paint? Love it!
Thank you kindly
Hi Leanne,
The brand was white knight strokes from the hardware store.
Thanks so much Jane 🙂
I’ve been dying to try out concrete candle holders! These are so creative and modern, I love it!! Great job!
ooo I can’t wait to see what you come up with!