

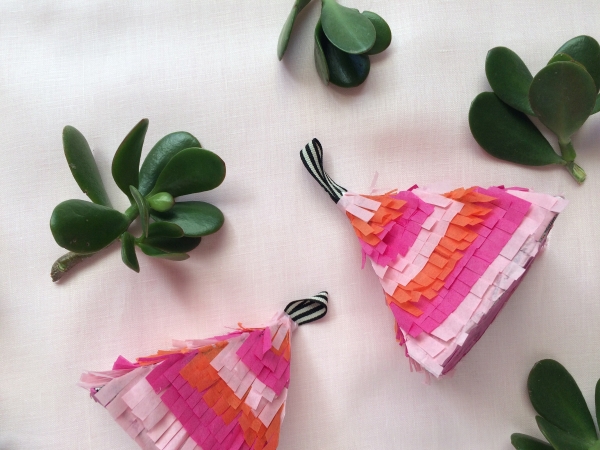
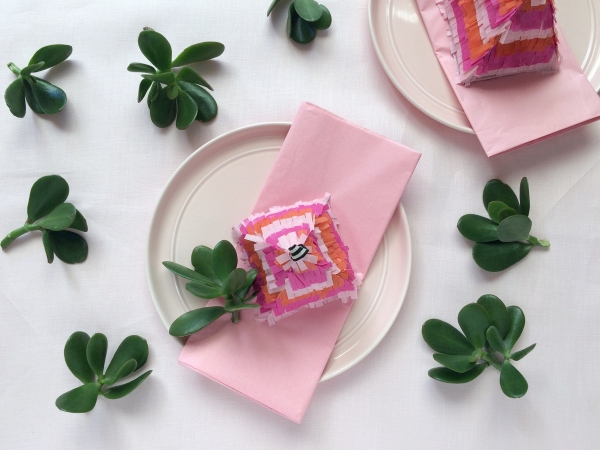
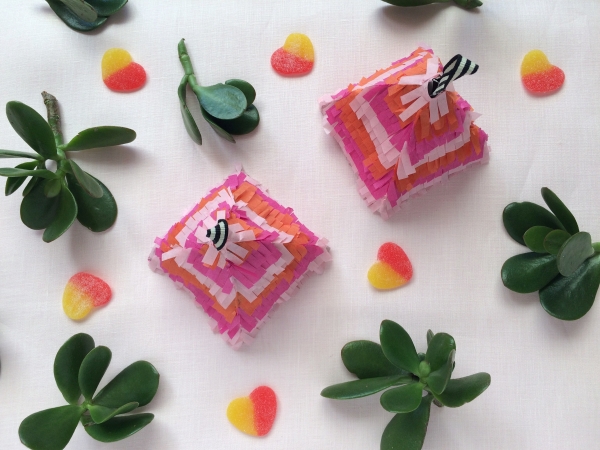
These mini geometric triangle pinatas add so much fun and colour to any wedding celebration, and are so much fun to create! They make the perfect table setting and can be filled with any extra treats you’d like to give to your guests. You could also craft the pinatas ‘en-masse’ for a stunning display (reception or ceremony – beautiful!), or use them as a biscuit free fortune cookie with a sweet note inside.
This DIY will take a little while as there are stages of drying, so invite your friends around and make a day of it! Or include it as a fun activity during your hen’s get together! Papier-mache is loads of fun, but prepare for a little mess too. Gather all your materials together and before you know it you’ll be hanging these beauties up to dry and admiring your craftiness!
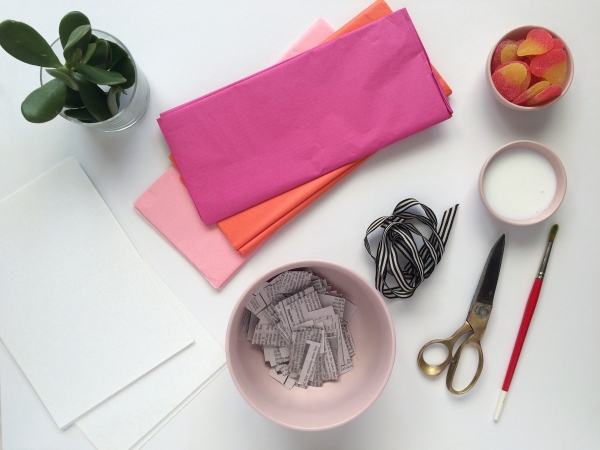
What you will need:
- Heavy weight paper or card
- Tissue paper in your chosen colour
- Strips of newspaper
- PVA glue or papier-mache paste (you can make your own with equal parts water and flour)
- Scissors
- Paint brush
- Ribbon
- Sweets or gifts for inside the pinatas
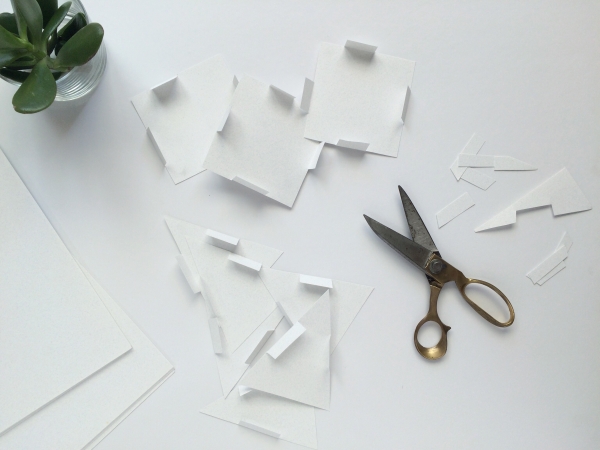
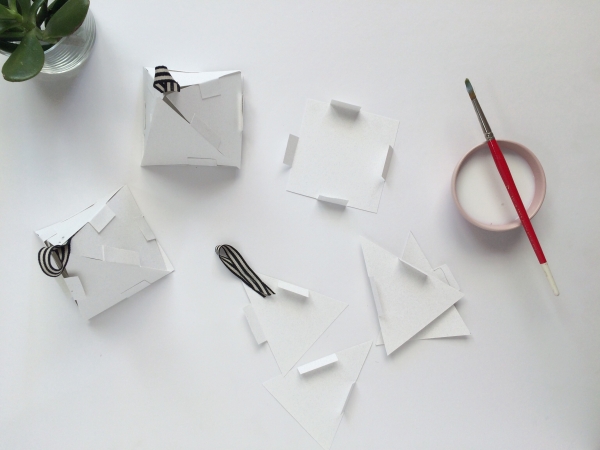
Step 1. Decide what shape of pinata you would like to make, and sketch it onto your card. If you’re making a few at one time, making a template will speed up the cutting process. When cutting, leave tabs on each side to make gluing (or taping) easier. For this tutorial (making geometric triangles) you’ll need four triangles and one square base.
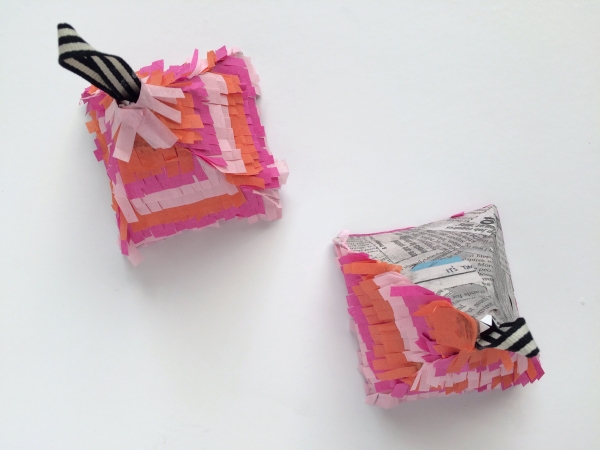
Step 2. Glue (or for a sturdier fix, staple) a short loop of ribbon onto the top of one side of each of the four triangles. Make sure it is held firmly in place.
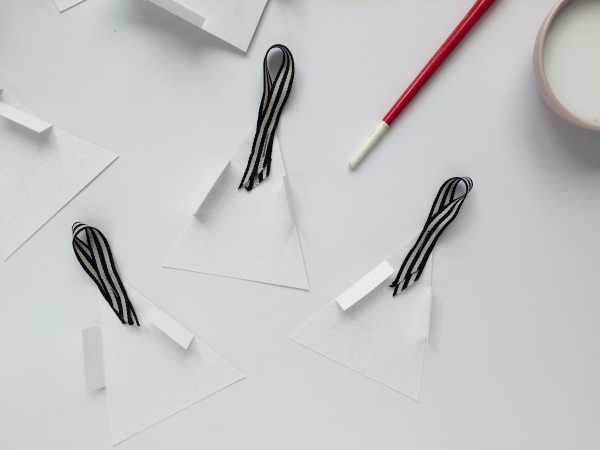
Step 3. Begin gluing (or taping) your pieces together, starting with the four triangles. Once they are firmly stuck together, attach the base. Allow these to dry completely. They will be a little fiddly and fragile, so take your time.
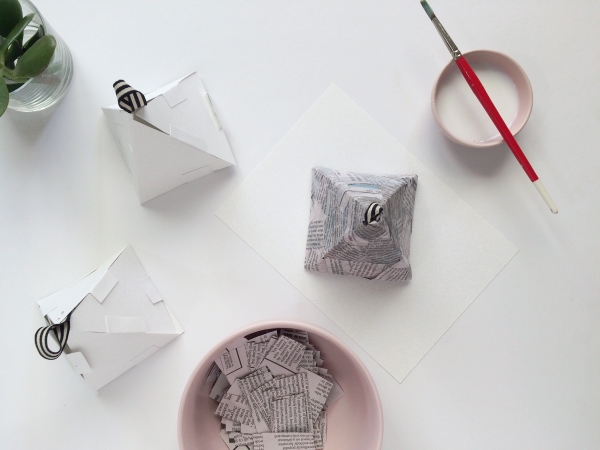
Step 4. Once the glue has dried, you can begin to paste on your papier-mache. Using glue (or homemade paste), work up a few layers of newspaper to strengthen the triangle. Leave to dry completely.
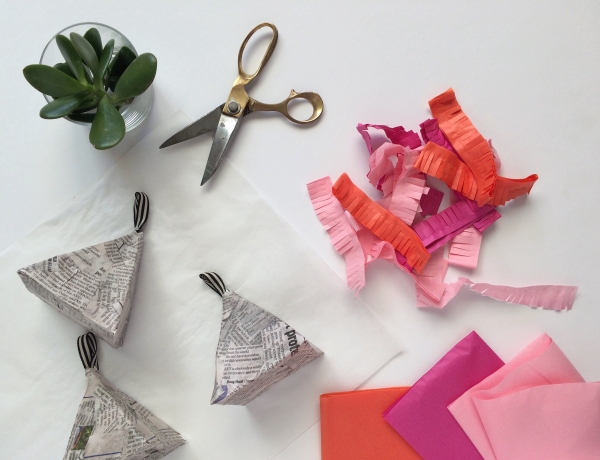
Step 5. While the papier-mache is drying, start cutting your tissue paper into strips, feathering the ends.
Step 6. Once the papier-mache has completely dried, use a sharp knife or scissors to cut a flap (make sure it’s still connected and not just a hole) in the bottom of the triangle. Pop your lollies or gifts inside, and seal up with tape. Be sure the pinata is completely dry to avoid soggy sweets!

Step 7. Glue a square of tissue paper on the base (using a darker colour will mean you’ll see less of the newspaper). Starting on one side of the triangle, paint the whole side with glue. Layer your tissue paper frills in your chosen design from the bottom until you reach the top. Trim the sides before beginning the next side.
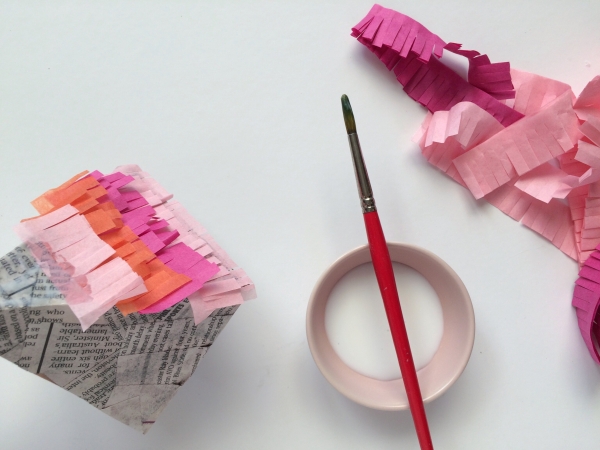
Step 8. Continue for each side, trimming the edges as you go. Once you’ve reached the top at all four sides, finish the top neatly with one strip of tissue paper. Leave to dry.
Once your mini pinatas are completely dry, you can use them as place settings, hang them from branches as a welcome tree or hand them out as gifts for your guests! Be sure to let guests know if there is a little treat hiding inside the pinata for them – they might not want to destroy your lovely work of art!
Images by Ms Honeycomb
![]()
Ms Chinoiserie Says: So colourful and fun – I love the idea of putting something special inside as guest favours!
About Ms Honeycomb – Hi, I’m Nicola, the florist and crafter behind rubyandjoy. I’m a gardening, fabric loving, mint tea drinking, brownie baking, book obsessed maker! I love a good adventure having just moved back from five years in Scotland (with my lovely Scottish husband).


Join the conversation