

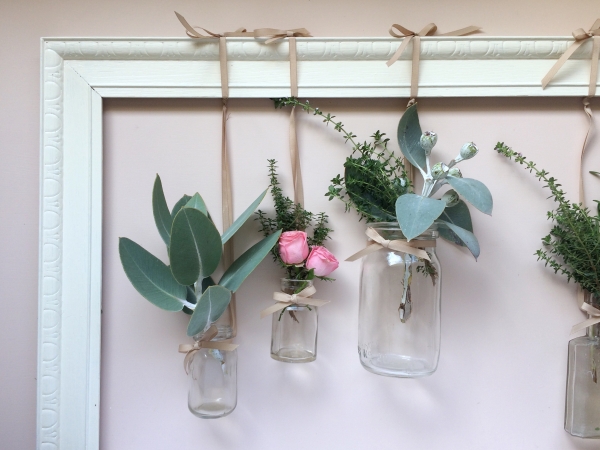
Our framed flower hanging jars tutorial is such a simple way to beautify any room! If you’re looking to decorate your wedding or bridal shower, this is an easy way to add blooms around the space, not simply on table tops. Although this frame is hung on a wall, it also works beautifully when simply lent up against a solid surface! You could pop the frames against hay bales for an outdoor wedding, or lean them up against a wall behind your drinks table – lovely!
There are so many variations to make these floral pieces work for any theme. Consider finding several frames and painting them all to match your colour scheme, or using several different kinds of ribbon (or even lace)! Grab some girlfriends and have a craft day – you’ll have these made in no time at all. All the frames need then are some blooms and somewhere to party!
You Will Need:
- Picture frames – try op-shops for some good bargains. They’ll likely need a sand and a lick of paint!
- Ribbon
- Jars of different sizes and shapes – all with a lip at the top of the jar
- Your chosen flowers and foliage
- Scissors

What To Do:
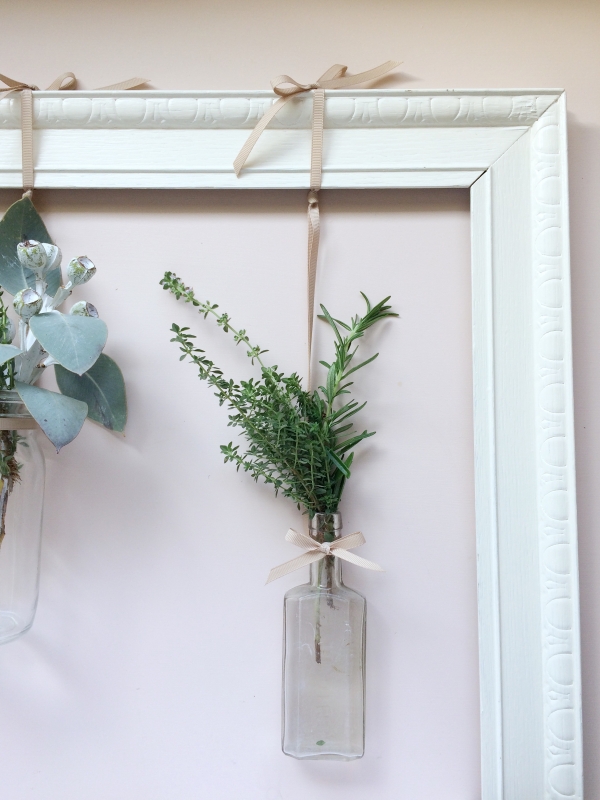
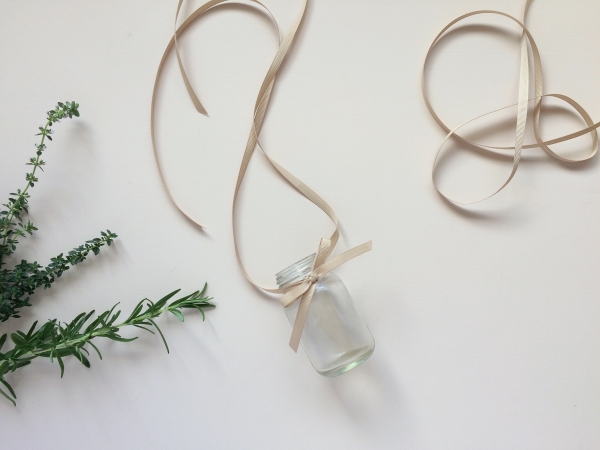
Step 1. Cut your ribbon into long lengths. Start with one jar to give you an idea of how much you’ll need. Take two pieces of ribbon and begin by tying them together in a knot approximately two-thirds of the way down the lengths. This knot will sit at the back of your jar. Tie a bow with the remaining one-third of ribbon at the front of the jar.
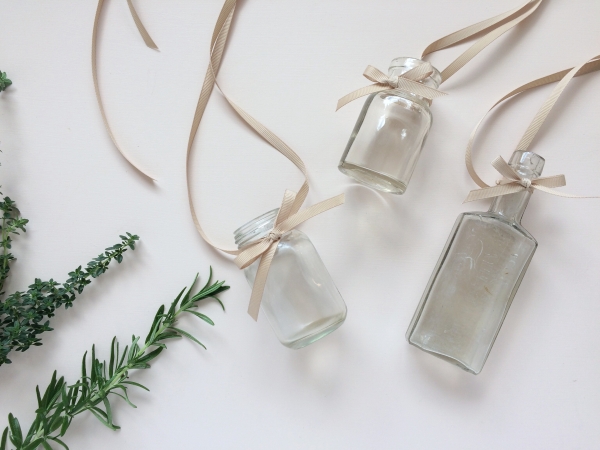
Step 2. Continue to tie all the jars the same way, being sure each knot is very secure and the ribbon will not slip off the top of the jar. You’ll vary the hanging heights for each jar, so don’t worry if some lengths of ribbon are longer than others!
Step 3. Once you’ve tied all the bows, arrange the jars in your frame at the height you would like them to hang. Tie a knot where the ribbon first meets the frame. This will stop the jars from swinging about!
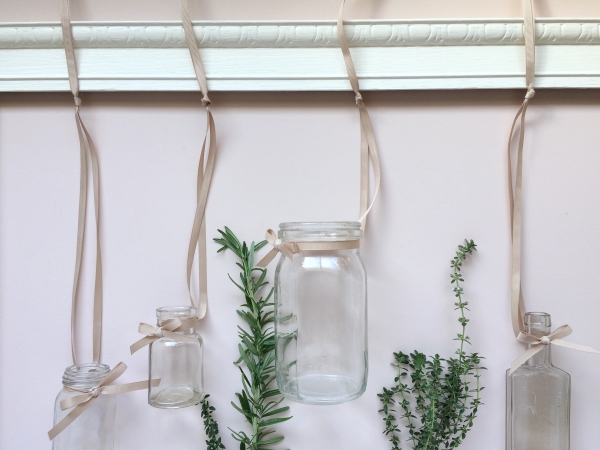
Step 4. Tie the jars onto the top of the frame, with the knot below securely holding the jar in place. You can leave the ribbon long, cut it short or tie it in bows. It is easiest to do this with the jars resting on a table top or in your lap.
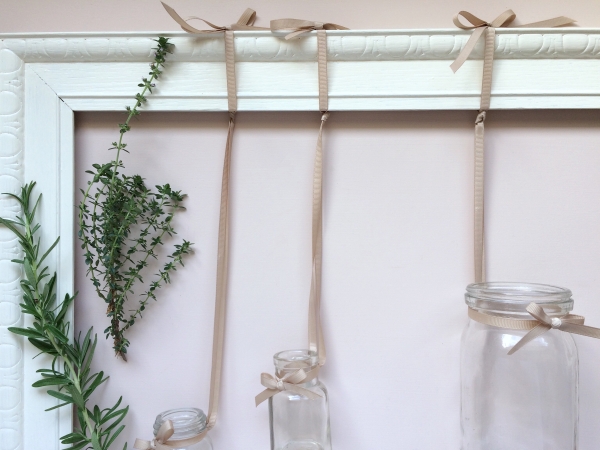
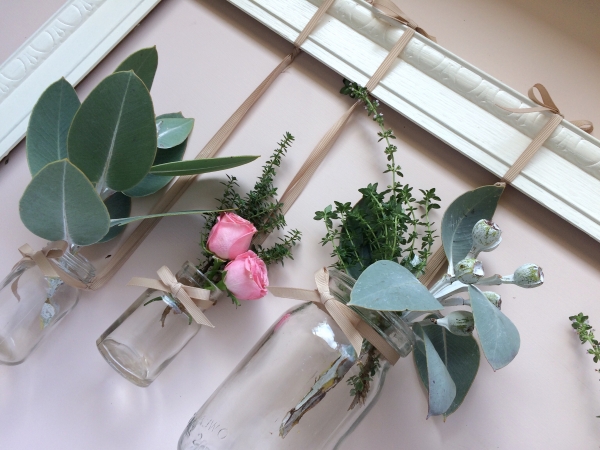
Step 5. Now that your frame is complete (and looking lovely!), pop it into position and pour a little water in each jar. You only need enough to cover the bottom of the stems, so it won’t be much at all. Place your chosen flowers and foliage into the jars and you’re done! Stand back and admire your creation!
If you’re looking for ways to lengthen the life of these blooms, you could untie (or snip) the jars from the frame at the end of your celebrations and give them to guests to take home! This simple way to fancy up blooms in jars will have your next soiree looking just gorgeous!

All images by Ms Honeycomb
![]()
Ms Chinoiserie Says: I’m swooning over this gorgeous tutorial – so pretty and very unique!
About Ms Honeycomb – Hi, I’m Nicola, the florist and crafter behind rubyandjoy. I’m a gardening, fabric loving, mint tea drinking, brownie baking, book obsessed maker! I love a good adventure having just moved back from five years in Scotland (with my lovely Scottish husband).


Join the conversation