

Bonbonnieres are a time old tradition that have been gracing the dinner tables of weddings and special events for as long as can be remembered.
Originating in Italy, the tradition was a way to thank guests for their well wishes and their generosity of beautiful gifts. Five sugared almonds in a small bag or box were a symbol of five wishes for the newlyweds – health, wealth, happiness, children and long life.
These days the tradition of giving a gift is still very popular however the gifts themselves have taken many new directions. Popular trends in the past few years have been homemade jams and chutneys, small plant pots, living gifts and lolly jars. These options are popular amongst the DIY Bride as they share that special “homemade love”.
A new idea that we think is fantastic is Chocolate Bark. Not only fabulously delicious but chocolate bark is fun, modern and allows you to tie it in with your colour scheme.
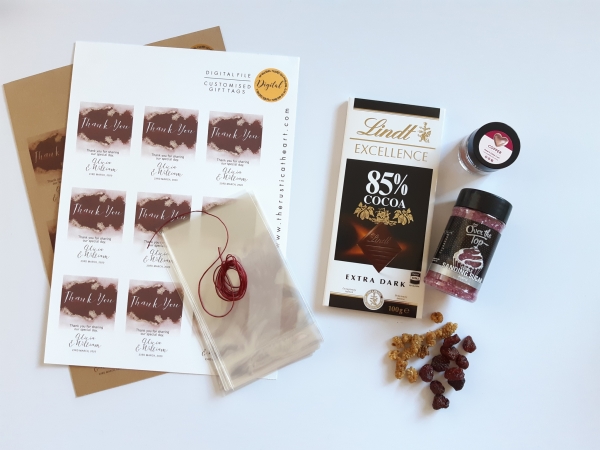
STEP 1: GATHER YOUR INGREDIENTS
Choose your chocolate! White chocolate is fantastic for the lighter more romantic colour schemes. Milk and Dark Chocolate are great for a modern bright mix or a deeper moodier style. We have used Lindt chocolate for all three of our Barks.
Choose your decorations/mix ins. Select nuts, dried or freeze dried fruits, sprinkles, sparkles and edible glitter that will complement your chocolate colour and wedding scheme.
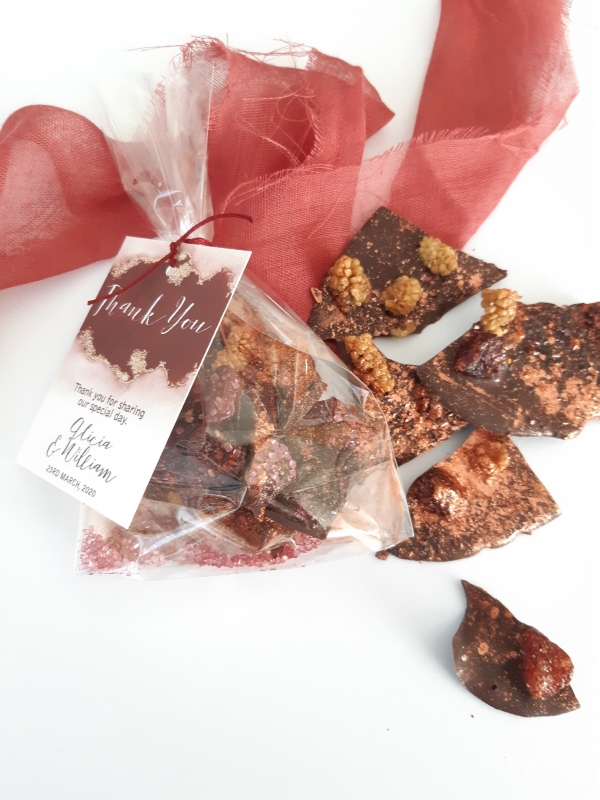
STEP 2: PREPARE PACKAGING
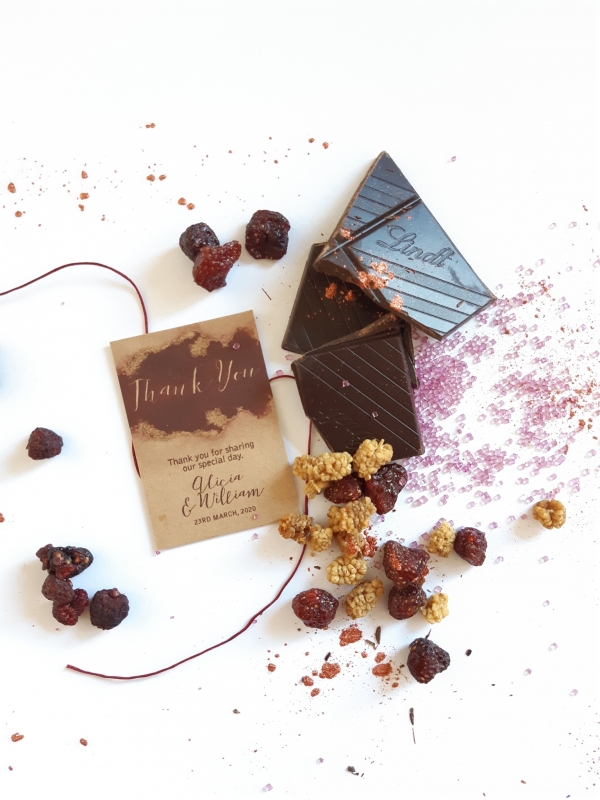
The Chocolate Bark is impressive when completed so purchase some small clear gift bags so you can show off your hard work when complete.Create your own thank you tags or download a digital file and print at home. Use similar colours to your decorations to tie the gift together. Choose a coloured twine, string or ribbon that will add to your presentation.
STEP 3: COOKING
There are many great recipes around for chocolate bark so take a look online to see if any in particular take your fancy. We have followed the this recipe for our chocolate bark but choose one that suits you. This recipe is simple and perfect for any DIY Bride. After melting your chocolate, adding in your mix-ins and letting it set in a refrigerator it is time for the fun part!
Break up your bark into a mixture of sizes and shapes.
STEP 4: PRESENTATION
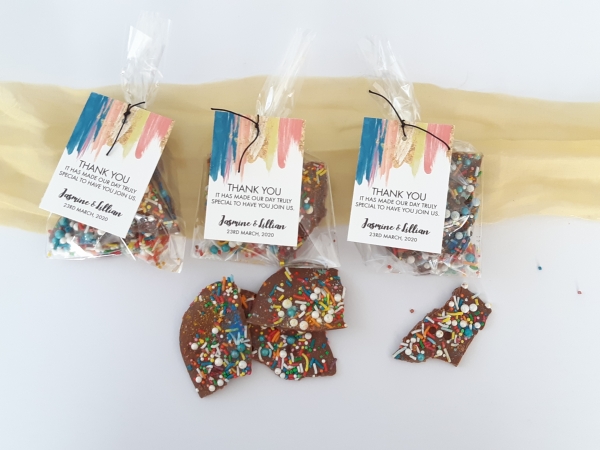
Using your clear bags, string and tags divide your bark into the bags. Add a few additional loose pieces of your decorations eg. Nuts or sprinkles etc. This will add some additional interest to the bags. Tie up, ready for the big day and keep refrigerated for best quality and to avoid melting. We have made three different styles to show you how unique Chocolate Bark can be.
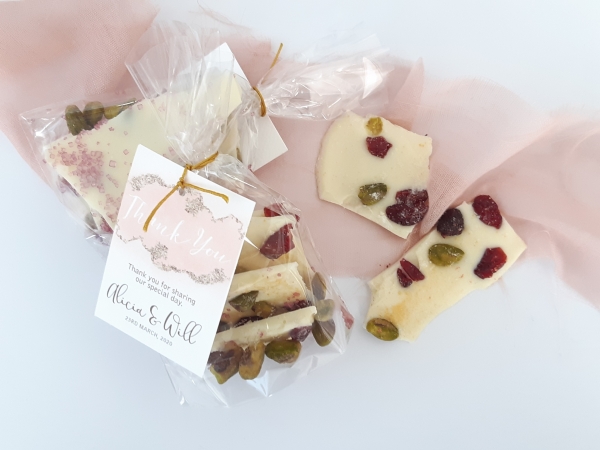
White Chocolate, pistachio and cranberries sprinkled with gold edible glitter looks elegant and romantic with the Peach watercolour gift tag. Ideal for the soft and dreamy wedding colour scheme. Our Milk Chocolate and sprinkle bark is dusted in bright blue and yellow cake dust for a bold effect. This bark is fun, bold and edgy. Perfectly suited to a wedding that is about a bold celebration.
Finally the dark chocolate combination is a deep earthy mix of deep autumn tones and is full of freeze dried berries. Cake crystals and copper cake dust were the perfect finishing touches for this bark.
Don’t be afraid to mix and match and make your Chocolate bark to suit your wedding colour scheme and style. Have some fun and don’t forget to lick the bowl!
![]()
Ms Zebra Says: I absolutely LOVE this idea! It’s a thoughtful, yet easy DIY gift that your guests will appreciate – and enjoy!
![]()


Join the conversation